WPOven provides one free Email account with every server plan.
Your Email account can be setup simply by just filling a very small form.
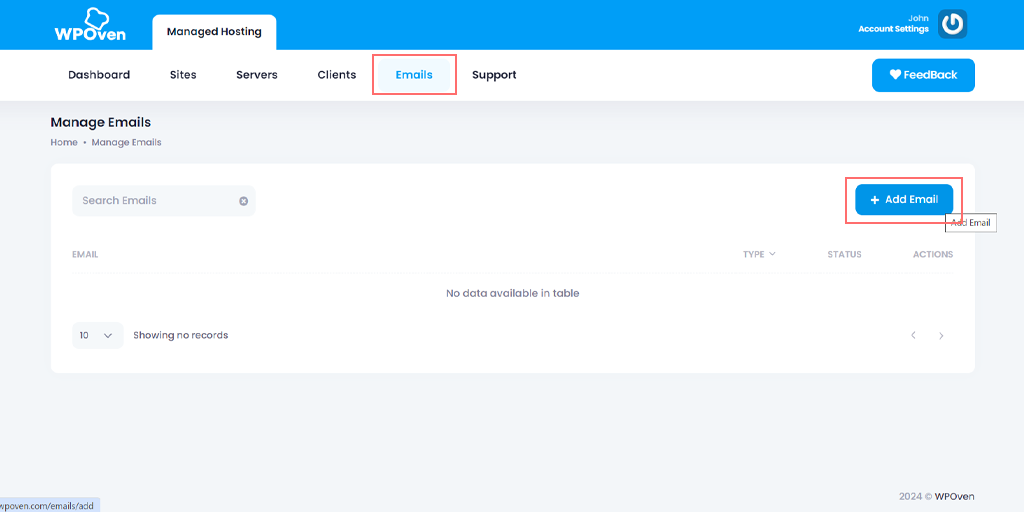
Step 1 : Login to your WPOven dashboard and click on the 'Emails' tab and click on the 'Add Email' button.
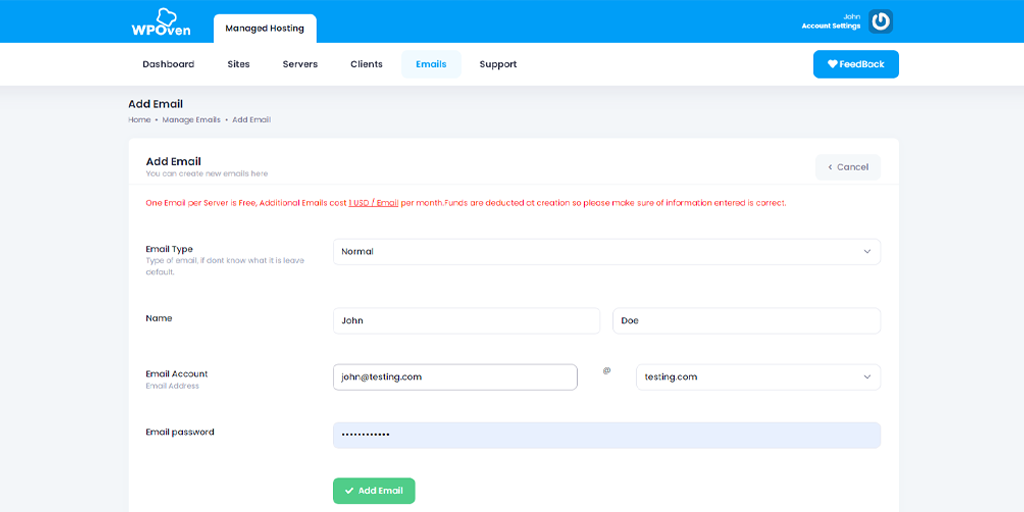
Step 2 : Fill the form and press the 'Add Email' button when done.
'Email Type' : This is the type of Email account you wish to create. You can create either 'Normal' or 'Forwarding' type accounts.
'Email Account' : This field takes the Email account name that you wish to create with the domain name on which you require it.
'Name' : Name of the Email account holder.
'Email Password' : Password for the Email account.
Step 3 : Your Email account is now created.
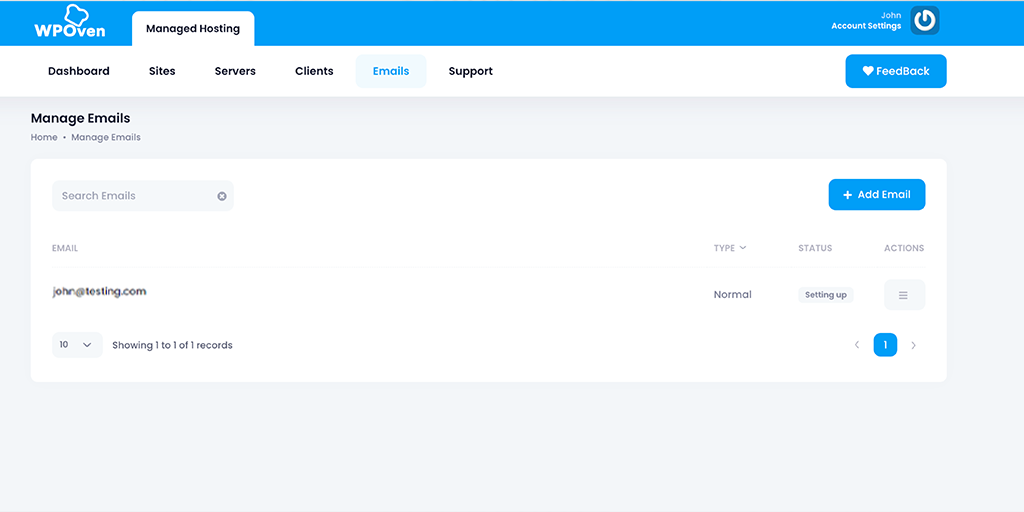
To make changes or see the DNS Details and Email Client Details of the Email account, click on the 'Edit' button.