Chances are that you have already registered a domain name for your website which you are going to host on our platform. If not yet you can register it via services like godaddy,enom. Mostly all registrars host their own nameservers and you will have to configure your DNS on their control panel. Please follow the instructions below for configuring your DNS records :
1. First of all you will have to park your domain. If you have not made any changes in your registrar name server and DNS settings then you can skip this step. Parking your domains means using your registrar name servers for DNS configurations.
2. Go to name server settings section. Different registrars name this setting differently but most frequently used names are "set name server", "name servers", "park my domain", "transfer DNS back", "fix my domain automatically". If you can not find any such or similar setting in control panel please contact your registrar help or support for parking your domain.
3. Now go to the DNS settings section. It is named like "Manage DNS Records", "DNS settings", "All host records". In this section you will see a table with different records in it. You will have to create or modify two records of types "A" (Address Records or Host) and "CNAME" (Alias Records).
4. First check for a record of type "A (host)" in the table if you found then click on modify button or click on create new A records button then proceed. Now Fill in the below mentioned values in the form
Host Name - @
Point to/IP Address - (your IP address can be found under your WPOven dashboard's 'Server' tab)
Type - A/A (Address)
and click save.
5. Now similarly for a "CNAME" records you have to create a records with below mentioned values
Host Name - www
Point to - @ or IP Address -
Type - CNAME
and click save.
Please note that it can take upto 4-24 hours for the settings to take effect, usually its a lot quicker.
If your website does not work as expected or you require any help regarding this issue, please feel free to contact our support team for help.
- Configuring your NameCheap Domain
- Configuring your GoDaddy Domain
- Configuring your 1&1 Domain
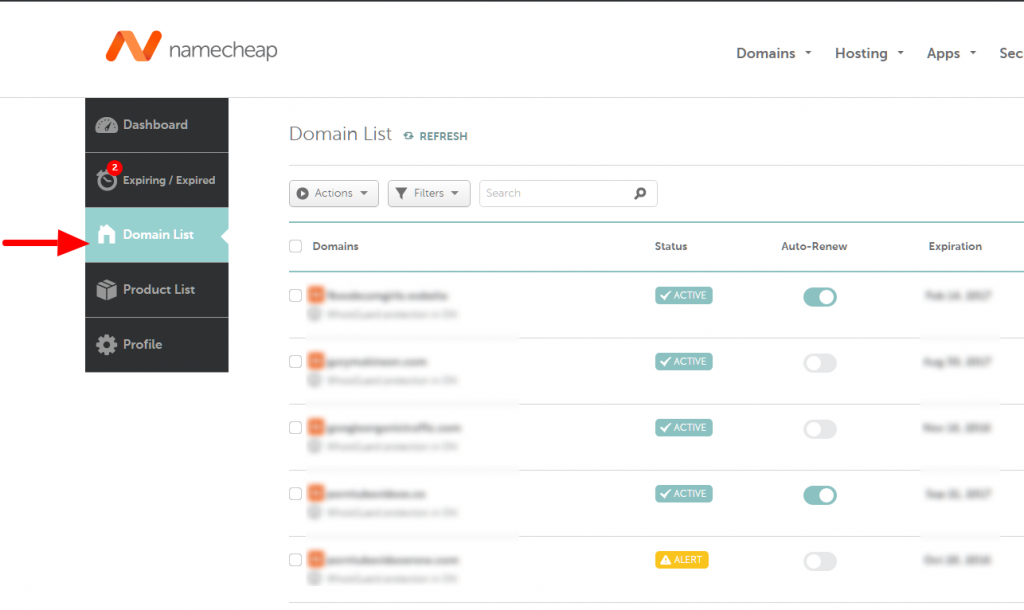
1. Login to your Namecheap account and navigate to the "Domain List" menu from the sidebar. You will see the list of domains hosted at Namecheap now. Select the domain you wish to point to your WPOven server.
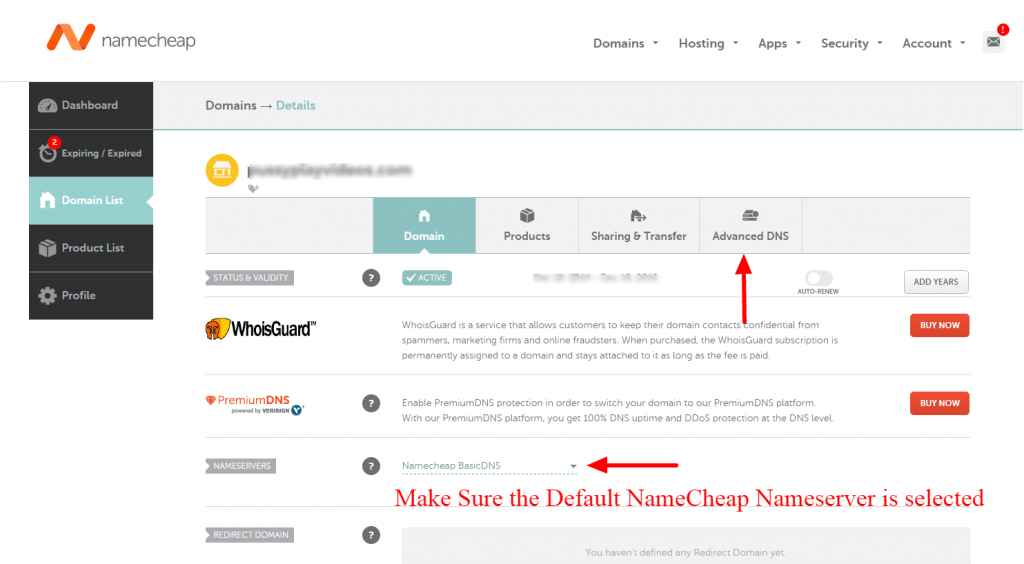
2. Now make sure the 'Nameservers' are set to the default namecheap nameservers. Once you have confirmed this, click on the 'Advanced DNS' tab
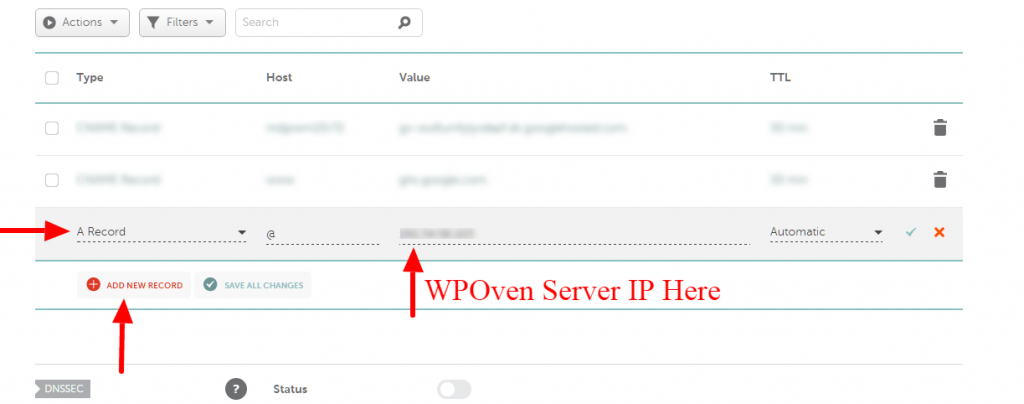
3. Under the 'HOST RECORDS', click on the 'Add New Record' button and create an A Record with the following values :
Host : @
Value : Your WPOven Server IP ( can be found under your WPOven dashboard's 'Server' tab )
TTL : Automatic
Then click on the check (tick) icon to save the record.
Similarly create a Cname record with the following values :
Host : www
Value : Domain name (For example 'domain.com') without the 'www'
TTL : Automatic

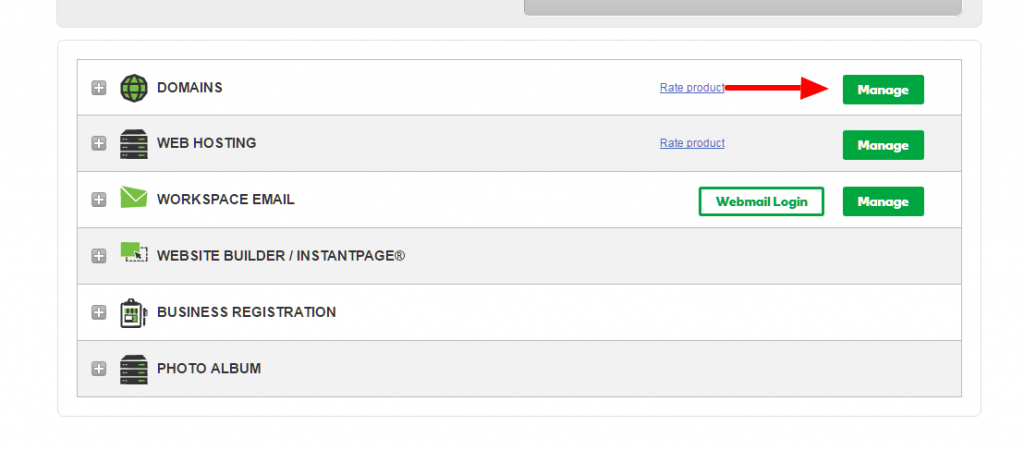
1. Login to your GoDaddy account and click on the 'Manage' button in front of the 'Domains' row.
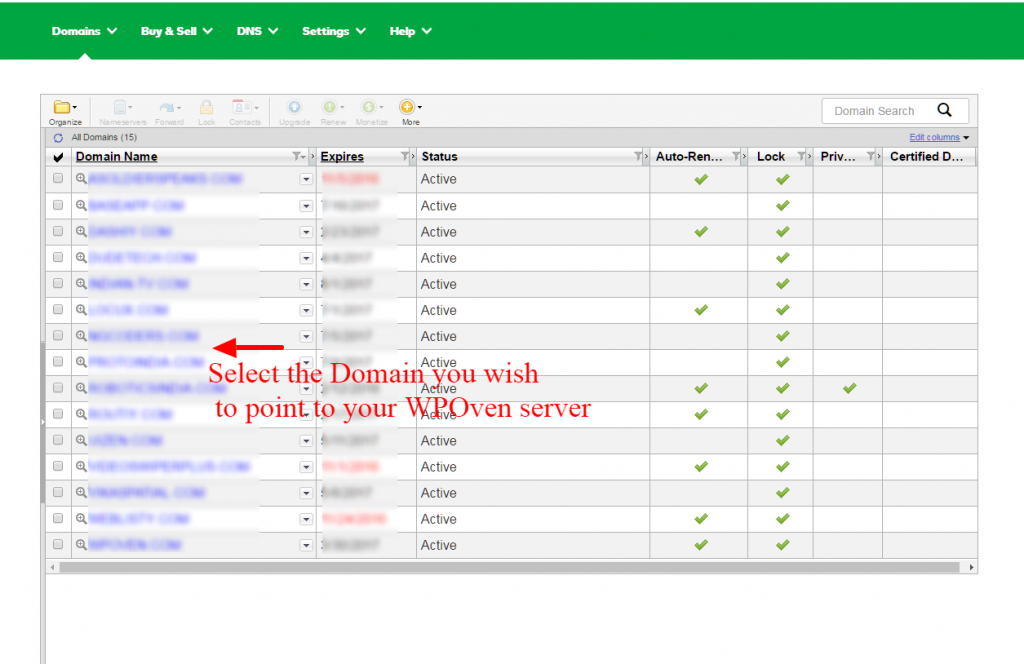
You will see the list of your domains hosted with GoDaddy. Select the domain you wish to point to your WPOven server.
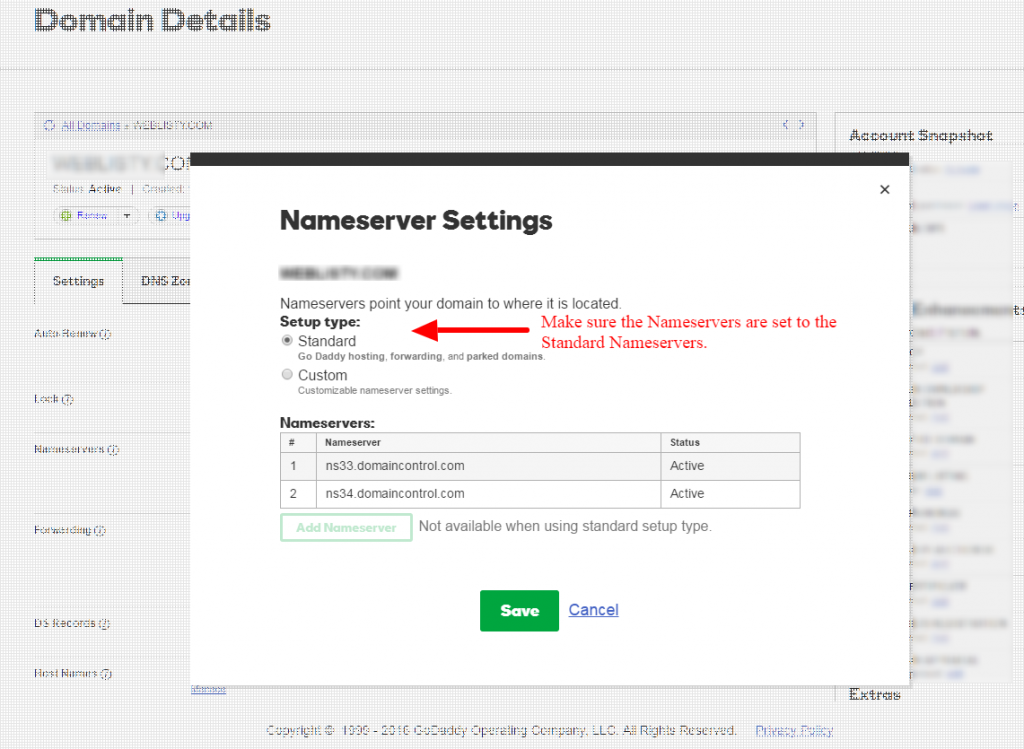
2. Now make sure that the 'Nameservers' are set to the Default GoDaddy Nameservers.
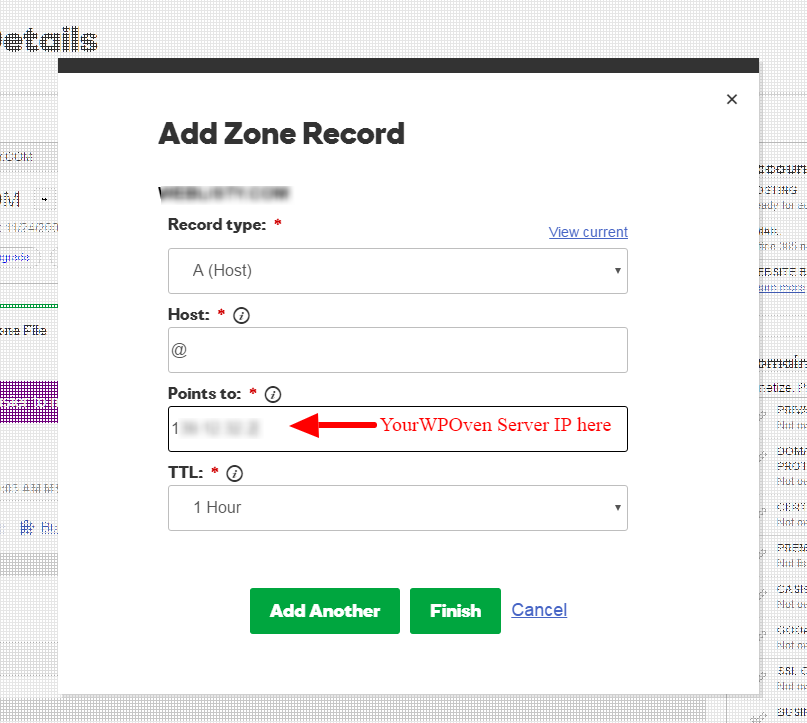
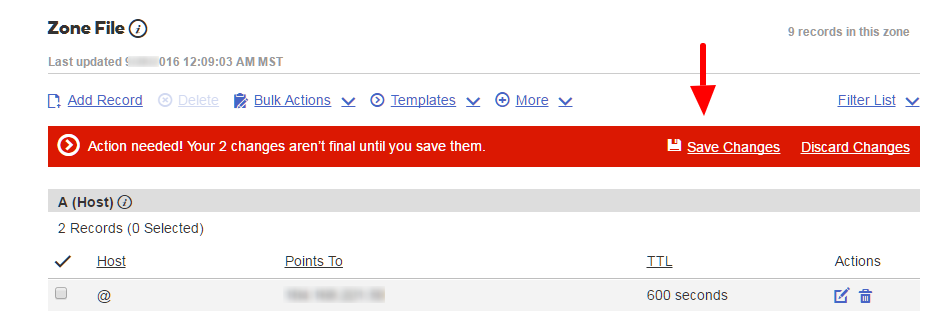
3. Select the 'DNS Zone File' subtab and click on the 'Add Record' button.

4. Then create an 'A' Type record with the following values:
Host : @
Points To : Your WPOven Server IP ( can be found under your WPOven dashboard's 'Server' tab )
TTL : Automatic
Then click on the Add Another icon and create a Cname Type record.
Similarly, create a Cname type record with the following values :
Host : www
Value : @
TTL : Automatic
Then press the Finish button and save the records that you have just created.
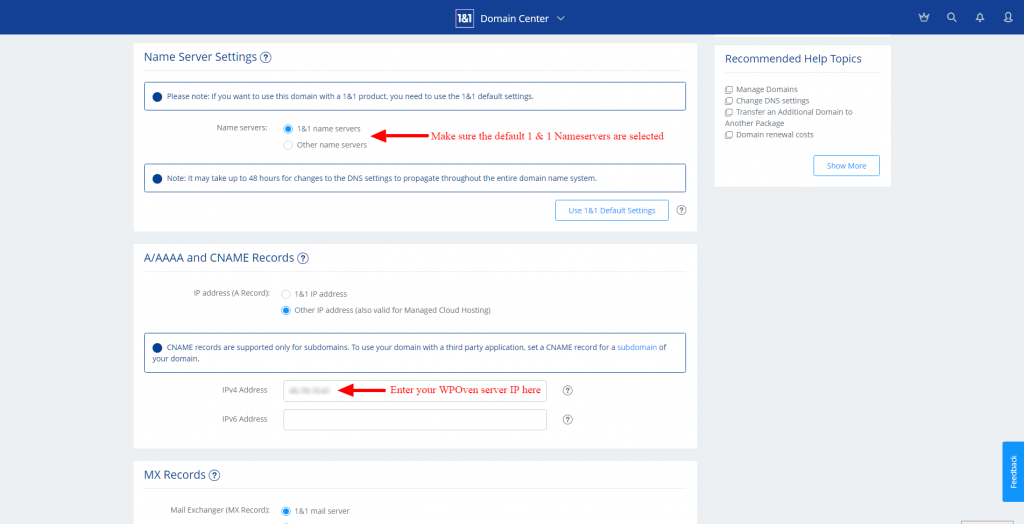
1. Login to your 1and1 control panel and click to the "Manage Domain" button
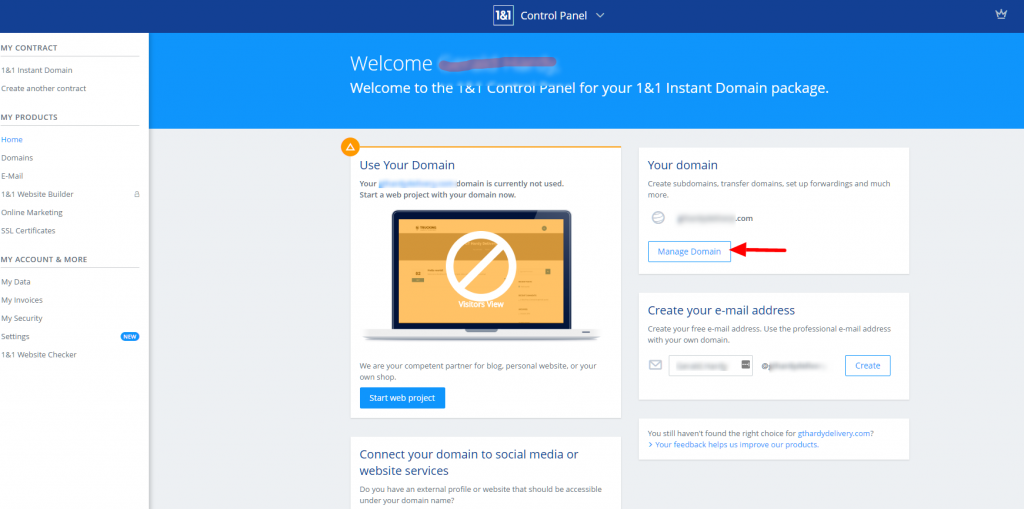
2. Now you will see the Domain's settings page. Click on the 'Edit DNS Settings' option as shown in the screenshot below

3. Make sure the Name Server Settings is set to '1 & 1 name servers' setting and in the 'A/AAAA and CNAME Records' setting the IPv4 field has your WPOven server IP entered in it.