What is Let's Encrypt ?
Let’s Encrypt is a service provided by the ISRG (Internet Security Research Group). It is a free, automated, and open certificate authority (CA), run for the public’s benefit.
It is based on the following key principles :
To begin the installation of the Free letsencrypt SSL with Nginx on Ubuntu, you require
- Root SSH access or non-root user access who has sudo privileges
- Nginx installed on the server
- DNS records for the domain in place and pointing towards the server IP
In order to obtain a SSL certificate from LetsEncrypt, you first need to install it's client on the server.
You require GIT and bc to install the client. If you do not have these installed, you can install them using
sudo apt-get update
sudo apt-get -y install git bc
Clone the LetsEncrypt Client from the GitHub repository
sudo git clone https://github.com/letsencrypt/letsencrypt /opt/letsencryptNext we need to make the required changes in the Nginx config file.
Open the site's Nginx config file. By default it should be in the folder /etc/nginx/sites-available. The file, by default is named after the domain name. You can also make these changes in the /etc/nginx/sites-available/default file also.
Also before making this change, you would need to know the server's webroot-path. This is basically the path where you have all the folders for the site's that are installed on the server. In this example, we are assuming it to be '/var/www'
# Letsencrpyt Nginx block
location ~ /.well-known {
       allow all;
       default_type "text/plain";
       root /var/www;
}
Check the Nginx config and it it shows ok, then restart Nginx
nginx -t
service nginx restartTo obtain the certificate, we will use the letsencrypt-auto command.
We first need to move the letsencrypt folder and then run the letsencrypt-auto command for the domain. If you want a signle certificate to work with multiple domains, for example, domain.com and www.domain.com, then make sure to include both the domains in the command. We would also need to use the webroot-path that we used in the Nginx config as well.
cd /opt/letsencrypt
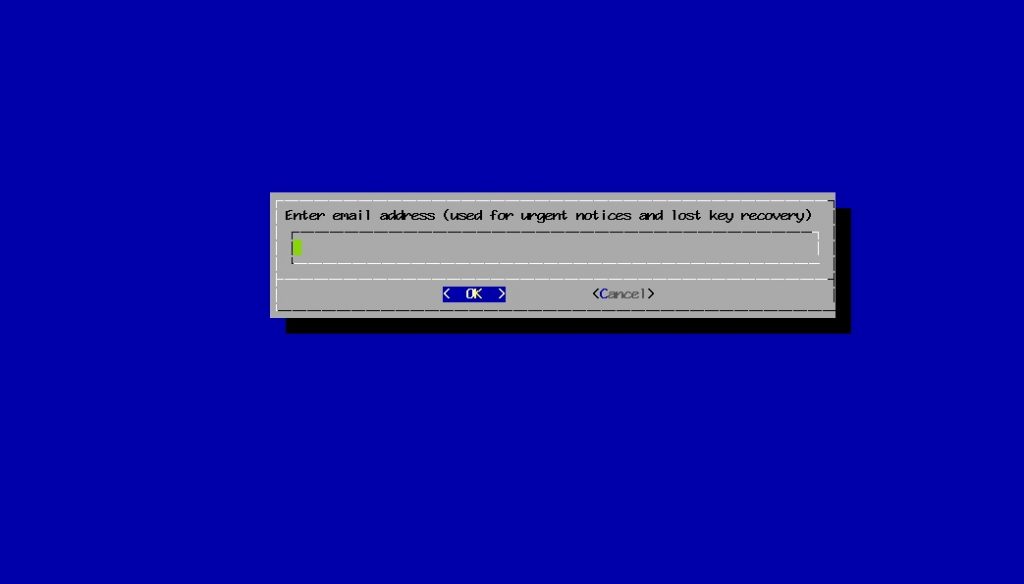
./letsencrypt-auto certonly -a webroot --webroot-path=/var/www -d domain.com -d www.domain.comYou should now see User interface which will ask for an Email used to communicate with you to send urgent notices and lost key recovery.
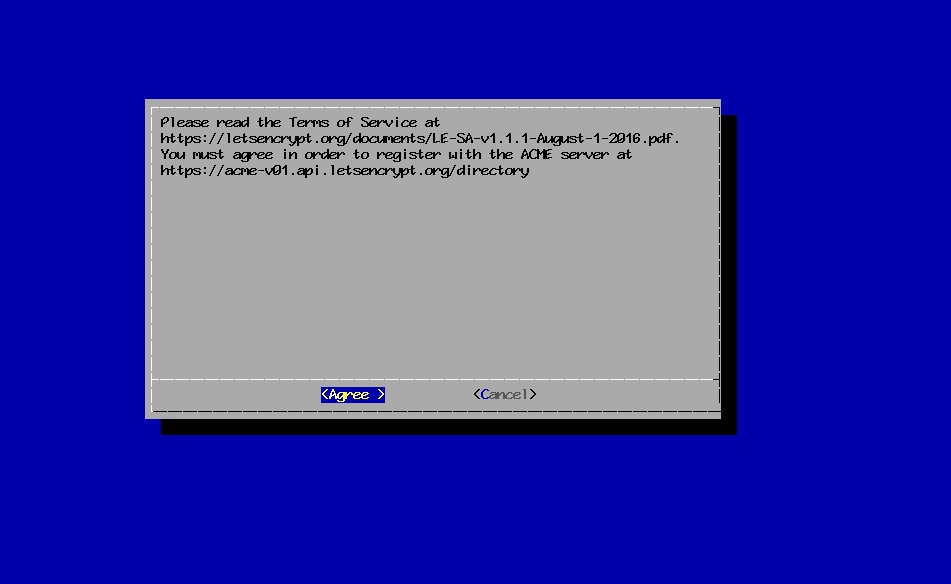
Then you would need to agree with the LetsEncrypt subscriber agreement.
If everything goes as it should, you should now see an output message like this
Output:
IMPORTANT NOTES:
 - Congratulations! Your certificate and chain have been saved at
   /etc/letsencrypt/live/domain.com/fullchain.pem. Your cert
   will expire on 2016-12-02. To obtain a new or tweaked version of
   this certificate in the future, simply run letsencrypt-auto again.
   To non-interactively renew *all* of your certificates, run
   "letsencrypt-auto renew"
 - If you lose your account credentials, you can recover through
   e-mails sent to [email protected].
 - Your account credentials have been saved in your Certbot
   configuration directory at /etc/letsencrypt. You should make a
   secure backup of this folder now. This configuration directory will
   also contain certificates and private keys obtained by Certbot so
   making regular backups of this folder is ideal.
 - If you like Certbot, please consider supporting our work by:

   Donating to ISRG / Let's Encrypt:   https://letsencrypt.org/donate
   Donating to EFF: https://eff.org/donate-le
You will also see the Certificate expiry date in the above success message. Once the certificate is expired, you can renew your Free LetsEncrypt SSL certificate by running the letsencrypt-auto command again.
If you do not see the success message, you can try the following :
- Make sure the site is not routing through DNS services like Cloudflare etc.
- In case of "Failed authorization procedure" error : Recheck the Nginx config
- In case of "Failed to connect to host for DVSNI challenge" : Check that the server is not behind any firewall, if so then it might need to be configured to allow TCP traffic on port 80 and 443.
Once the Certificate is installed, you would need update your site's Nginx config file again and add the Certificate paths in it:
listen 443;
ssl_certificate /etc/letsencrypt/live/domain.com/fullchain.pem;
ssl_certificate_key /etc/letsencrypt/live/domain.com/privkey.pem;
if ($ssl_protocol = "") { rewrite     ^   https://$server_name$request_uri? permanent;}