How to fix the err_connection_refused error?
As you have already seen, there can be various possible causes for triggering this error. However, it is still possible to resolve this error by following the troubleshooting methods mentioned below.
- Refresh the webpage
- Troubleshooting Website-Specific Issues
- Clear browser cache and cookies
- Disable Browser extensions or add-ons temporarily
- Try accessing the website from a different browser
- Troubleshoot Local network issues
- Flush DNS cache and Renew IP address
- Adjust DNS settings to use alternative DNS servers
- Scan your computer for malware or malicious software
- Disable any proxy settings
- Troubleshooting Server or Hosting Issues
- Update or Reinstall your Chrome browser
- Additional Resources and Tips
Read: 🚩 How To Fix the DNS_PROBE_FINISHED_NO_INTERNET Error?
1. Refresh the webpage
The most basic and primary troubleshooting step you can take is to refresh the webpage. Sometimes, these errors are temporary and can be easily fixed by simply reloading or refreshing the webpage.
To refresh a webpage, you can follow these steps:
- On your computer, use the keyboard shortcut:
- For Windows: Press the F5 key.
- For Mac: Press the Command (⌘) key and the R key simultaneously.
- Alternatively, you can use the refresh button on your web browser. It is usually located near the address bar and looks like a circular arrow.
- Another option is to right-click anywhere on the webpage and select the “Refresh” or “Reload” option from the context menu.
By performing any of these actions, the webpage will be refreshed, and it may help resolve temporary errors or loading issues.
2. Troubleshoot Website specific issues
If the error persists, check out the status of the website. As we have already mentioned, sometimes, the err_connection_refused error can trigger due to server-side issues rather than your internet connection issues.
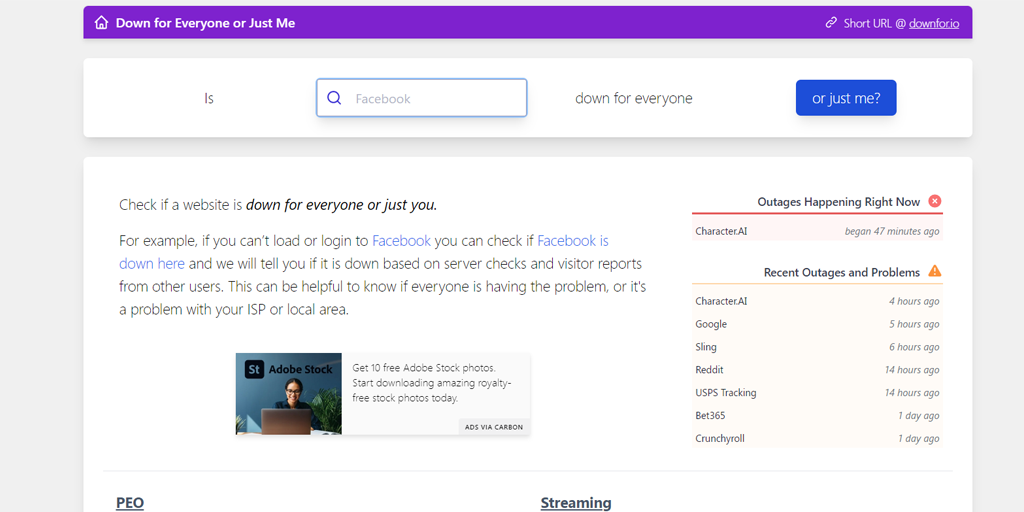
2.1. Check if the website is down for everyone or just for you:
Use online tools or check with other users to determine if the website is experiencing server issues or if the problem is isolated to your device.
Here you can use an online tool ” downforeveryoneorjustme“. Enter the website domain and check whether the website is down for you only or is unavailable for everyone.
2.2. Contact the web admin or support for assistance
Reach out to the website’s administrator or support team to report the error. They can provide further guidance or resolve any server-side issues.
2.3. Consider using a virtual private network (VPN) to access the website
Using a VPN can help bypass certain restrictions or resolve regional connectivity problems. Try accessing the website through a VPN and see if the error is resolved.
3. Clear browser cache and cookies
Over time, cached data or cookies can become corrupted or outdated, leading to interference with the connection. Clearing your browser’s cache and cookies can potentially resolve the error.
To fix the err_connection_refused error, you need to clear the browser cache and cookies. If you are using Chrome browser, follow the steps given below:
Step 1: Depending on your browser, Go to the settings menu.
In Google Chrome, for example, you can find the settings menu by clicking on the three vertical dots located in the upper right corner of the window.
Step 2: To proceed, select “More tools” and then click on “Clear browsing data”.
![How to fix the DNS_PROBE_STARTED Error? [8 Ways] 7 Clear browsing data in Chrome](https://www.wpoven.com/blog/wp-content/uploads/2023/03/7.png)
Step 3: A pop-up window will be displayed, and you can choose all three options located under the “Basic” section as depicted in the picture below. These options consist of “Browsing history,” “Cookies and other site data,” and “Cached images and files.
Step 4: Click on “Clear data” to initiate the process.
![How to fix the DNS_PROBE_STARTED Error? [8 Ways] 8 Clearing data in Google Chrome](https://www.wpoven.com/blog/wp-content/uploads/2023/03/8.png)
4. Disable Browser extensions or add-ons temporarily
Certain browser extensions or add-ons may conflict with the website’s server, causing the error. Disable them temporarily to identify if any of these extensions are triggering the err_connection_refused error.
In the Chrome menu, click on Advanced Tools — Extensions. To disable them just uncheck the toggle on each of them. Make sure you disable all the extensions, it is very important to identify the reason.
Then, try to access the website again. If the error does not appear anymore, all you have to do is to find the extension causing the error. Turn on the installed extensions one by one and check the availability of the problem site after each one.
5. Try accessing the website from a different browser
Switching to a different browser can be helpful in identifying whether the error is specific to your current browser or a more widespread issue. By using a different browser, you can determine if the error persists across different platforms or if it is limited to your current browser only.
Switching to a different browser can help determine if the error is specific to your current browser or a more general issue.
6. Troubleshoot Local network issues
If the above troubleshooting steps didn’t resolve the error, it’s time to focus on your local network. Follow these steps:
6.1. Verify network connectivity by checking other websites
Ensure that your internet connection is stable and working by accessing other websites. If you can’t connect to any websites, there may be a problem with your network.
6.2. Restart your router and modem
Power cycling your router and modem is a simple yet effective method to resolve network-related issues. By turning them off, waiting for a few seconds, and then turning them back on, you can reset the network connection and potentially resolve connectivity problems. This process helps refresh the network settings and can often restore a stable and functional connection.
6.3. Disable firewall or security software temporarily
Firewalls and security software can block connections to certain websites. To check if this is the cause of an error, temporarily disable them and see if the problem persists. However, remember to re-enable them afterward to maintain system security.
7. Flush DNS cache and Renew IP address
Flushing the DNS cache can help resolve domain name-related problems. It is because an outdated DNS cache can store some corrupt files which can cause network issues, such as err_connection_refused error.
To resolve this issue, you can flush your DNS to reset it and restore everything to normal.
7.1. For Windows 10 and Windows 11 users:
Step 1: Open the Run command by pressing the Windows key and R. Alternatively, you can search for it in the Start menu.
Step 2: Type “cmd” and hit Enter to open the Command Prompt.
![How to fix the DNS_PROBE_STARTED Error? [8 Ways] 13 Opening Command Prompt in Windows](https://www.wpoven.com/blog/wp-content/uploads/2023/03/6.png)
Step 3: Once the Command Prompt window is open, type “ipconfig/release” to release your current IP address.
![How to fix the DNS_PROBE_STARTED Error? [8 Ways] 14 Using Ipconfig command on CMD](https://www.wpoven.com/blog/wp-content/uploads/2023/02/ipconfig-release.png)
Step 4: Next, type “ipconfig/flushdns” to release the DNS cache.
Step 5: Type “ipconfig /renew” to obtain a new IP address.
![How to fix the DNS_PROBE_STARTED Error? [8 Ways] 15 ipconfig renew](https://www.wpoven.com/blog/wp-content/uploads/2023/02/ipconfig-renew.png)
Step 6: Type “netsh int ip set dns” and hit Enter to reset your IP settings.
Step 7: Finally, type “netsh winsock reset” to restore the Winsock Catalog.
![How to fix the DNS_PROBE_STARTED Error? [8 Ways] 16 netsh winsock reset](https://www.wpoven.com/blog/wp-content/uploads/2023/02/netsh-winsock-reset.png)
Step 8: After completing these steps, restart your computer to ensure the changes take effect.
7.2. For MacOS users:
Step 1: First of all, open the system preference options on your Mac. If you have a Gas Mask installed, it can make searching for system-related tasks easier.
Step 2: Next, navigate to the Ethernet tab and click on the advanced options.
Step 3: Under the TCP/IP tab, you will find the option to release a DHCP lease. Clicking on this option will allow you to clear out the local DNS on your Mac.
![How to fix the DNS_PROBE_STARTED Error? [8 Ways] 17 Renew DHCP in MacOS](https://www.wpoven.com/blog/wp-content/uploads/2023/02/renew-DHCP-lease.png)
Step 4: To clear the local DNS cache, go to Utilities > Terminal and enter the command.
Step 5: The command for flushing the local DNS cache is “dscacheutil -flushcache”.
Step 6: Once you have entered the command, there will be no separate success or failure message that pops up. However, in most cases, the cache will be cleared without any major issues.
8. Adjust DNS settings to use alternative DNS servers
If you want to fix any DNS network issues such as the err_connection_refused error, one of the most common solutions you can follow is to change the DNS address to either IPv4 or IPv6. However, it’s worth noting that while IPv6 is the newer version, IPv4 is still more commonly used. Follow these steps to change your DNS address:
8.1. For Windows 10 and Windows 11 users:
Step 1: If you are a Windows 10 or 11 User, you have to open the control panel by simply typing “Control Panel” in the search bar.
Step 2: In the Control Panel select Network & Internet > Network and Sharing Center.
Step 3: From the menu on the left, select Change adapter settings.
Step 4: Right-click on your network and select Properties.
Step 5: In the window that opens, click on Internet Protocol Version 4 (TCP/IPv4) from the list, then select Properties again.

Step 6: Click on Use the following DNS server addresses.
Step 7: Enter “8.8.8.8” for the Preferred DNS server and “8.8.4.4” for the Alternate DNS server.

Step 8: Click on the OK button to save your changes.
Step 9: Close all the windows and try re-accessing the website to see if the error is still present.
If the problem persists, you may need to try other solutions. However, changing your DNS address can often resolve internet connection issues.
8.2. For MacOS users:
Step 1: First, navigate to the System Preferences on your Mac. You can find this by clicking on the Apple icon in the top-left corner of your screen, and then selecting “System Preferences“.
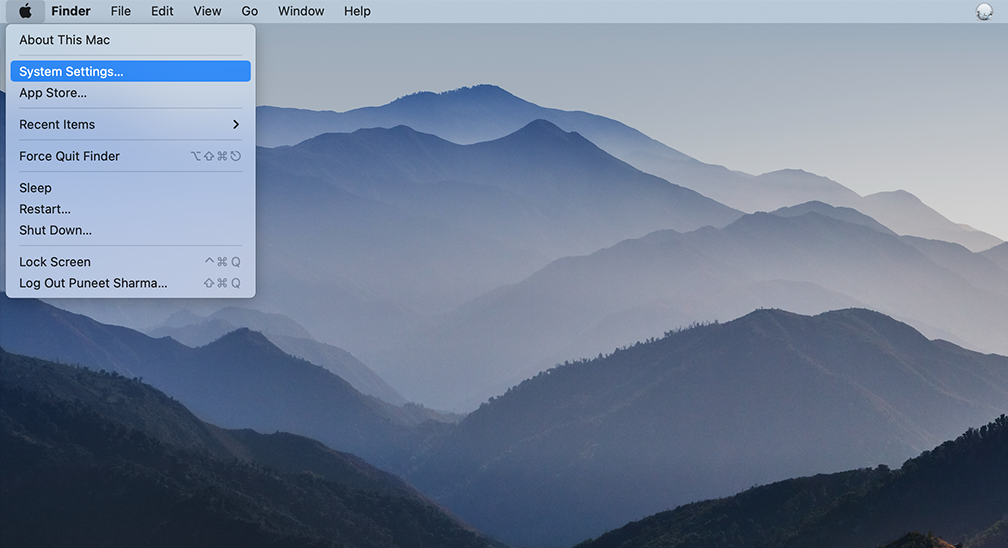
Step 2: Once you’re in System Preferences, locate the “Network” icon and click on it. From there, select the network connection that you want to modify (e.g., Wi-Fi or Ethernet).
Step 3: In the Network settings, you should see a button labeled “Advanced“. Click on that, and then navigate to the “DNS” tab.
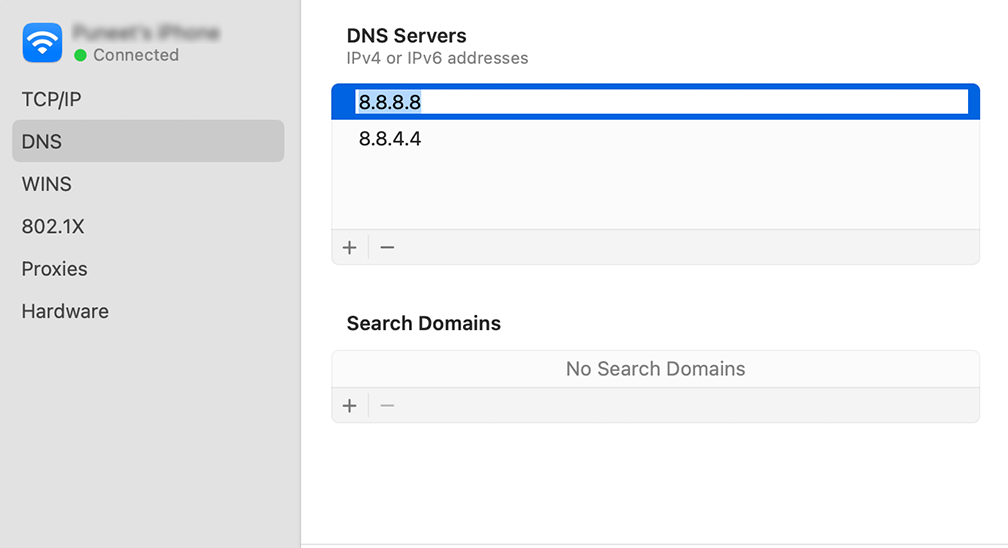
Step 4: Here’s where you’ll add the DNS server addresses. Click on the “+” button at the bottom-left of the DNS settings window, and then type in the IPv4 address for Cloudflare’s DNS servers: 1.1.1.1. Press enter, then repeat the process to add another address: 1.0.0.1.
Step 5: Finally, click “OK” to save the changes you’ve made. You should now be all set with your new DNS settings!
9. Scan your computer for malware or malicious software
Malware or malicious software can disrupt network connections. Running a thorough malware scan using reliable antivirus software can help you identify and remove any potential malware that may be causing the issue.
10. Disable any Proxy settings
Given the rise in security threats, many people are taking some safety steps to protect their sensitive data by using proxy servers.
You can consider it as a guardian angel that allows you to browse the web using a different IP address, acting as a helpful middleman between your browser and the websites you visit. Not only does it keep your real IP address hidden, but it also helps in filtering cache data and improving server communications.
However, just like any technology, proxy servers have their own limitations and downsides. Sometimes they can be the culprits behind the frustrating “ERR_CONNECTION_REFUSED” error.
For example, a web server might refuse the IP address associated with a proxy server, leading to the rejection of the actual connection.
It can be due to either your proxy server being incorrectly configured or it’s not available. Whatever the reason is, you must check whether the proxy is the culprit. To do so,
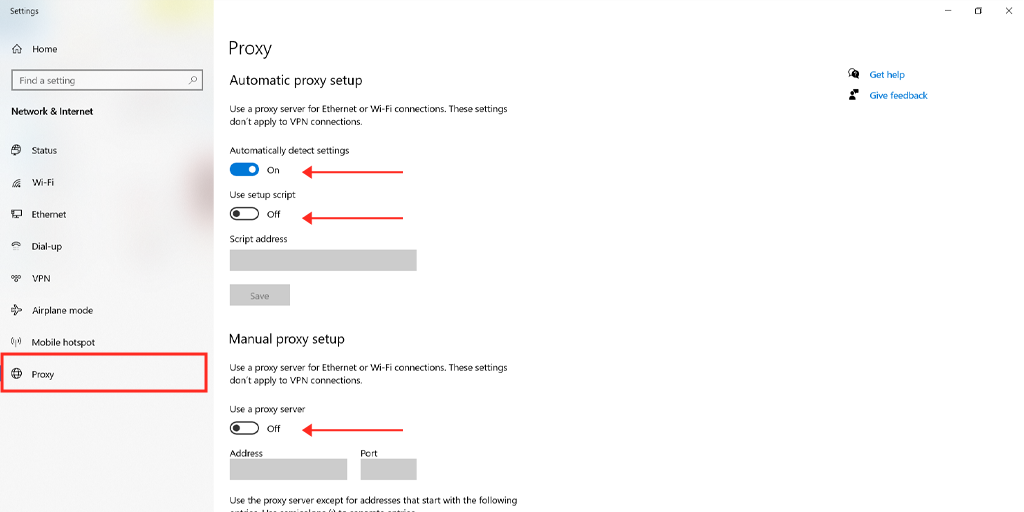
Read the guides on how to disable proxy on Windows and Mac.
10.1. For Windows users
Step 1: Go to your Chrome browser and click on the menu button “⋮” located at the top right corner and select “Settings”.
Step 2: Now scroll down and select the “system” section followed by “Open Proxy settings“.
Step 3: If you are a Windows 10 user or above it, this will open a separate proxy settings window.
Step 4: In the proxy settings window you will find two sections, Automatic proxy setup, and Manual proxy Setup.
Under Automatic Proxy Setup, Turn off: Automatically detect settings (Toggle button) and Use setup script (click on Set up > Turn off > Save)
Under Manual Proxy Setup, Turn off: Use a Proxy Server (Click on Setup button> Turn off > Save)
Under Manual Proxy Setup, Turn off: Use a Proxy Server (Click on Setup button> Turn off > Save)
For Mac Users, they can do the following steps to disable proxy settings:
Step 1: Go to the Apple menu or click on the Apple icon located at the top left of your Mac screen.
Step 2: Click on System Settings or System Preferences, whichever is applicable.
Step 3: Now click on the “Network” in the sidebar.
Step 4: From the right pane, Select a network service > click the Advanced button.
Step 5: Click on the Proxy tab and uncheck all the protocols under “Select a protocol to configure” and click on the “Ok” button when done.
11. Troubleshooting Server or Hosting Issues
11.1. Verify if the website’s server is running
Use online server status tools or contact the website’s administrator to check if the server is operational. If the server is down, you’ll need to wait for it to come back online.
11.2. Check server logs for any errors or issues
If you have access to server logs or error logs, review them for any indications of issues that could be causing the “ERR_CONNECTION_REFUSED” error. This information can help identify the root cause.
11.3. Contact your hosting provider for technical support
If you’re unable to resolve the issue on your own, reach out to your hosting provider’s technical support team. They can investigate the problem from their end and provide assistance in resolving the error.
12. Update or Reinstall your Chrome browser
Since nothing is perfect, neither are browsers. Like any web application, browsers are not completely bug-free. Therefore, they need to be updated with the latest available version from time to time. If an update is not available, an alternative method you can try is to completely reinstall the browser from its official website.
Additional Resources and Tips
Here are some additional resources and tips to help you further.
- Visit online forums or communities where users discuss similar errors and solutions.
- Check support articles or knowledge bases provided by browser developers, antivirus software vendors, or operating system providers.
- Keep your browser, operating system, and security software up to date to prevent compatibility issues.
- Consider seeking professional assistance from an IT expert or technician if you’re unable to resolve the error on your own.
What is the “ERR_CONNECTION_REFUSED” Error?
The “ERR_CONNECTION_REFUSED” error means that your request to connect to a website’s server has been rejected due to some reasons.
The “ERR_CONNECTION_REFUSED” error is a common issue that many users encounter when trying to access a website. It signifies a connection failure between your device and the website’s server.
The err_connection_refused error is primarily considered a client-side error, which means that the main culprit generating this error is either your system or machine.
However, it is important to note that the “ERR_CONNECTION_REFUSED” error can also be triggered from the server end in rare cases. While it is primarily considered a client-side error, there are instances where the target server can be the source of the error.
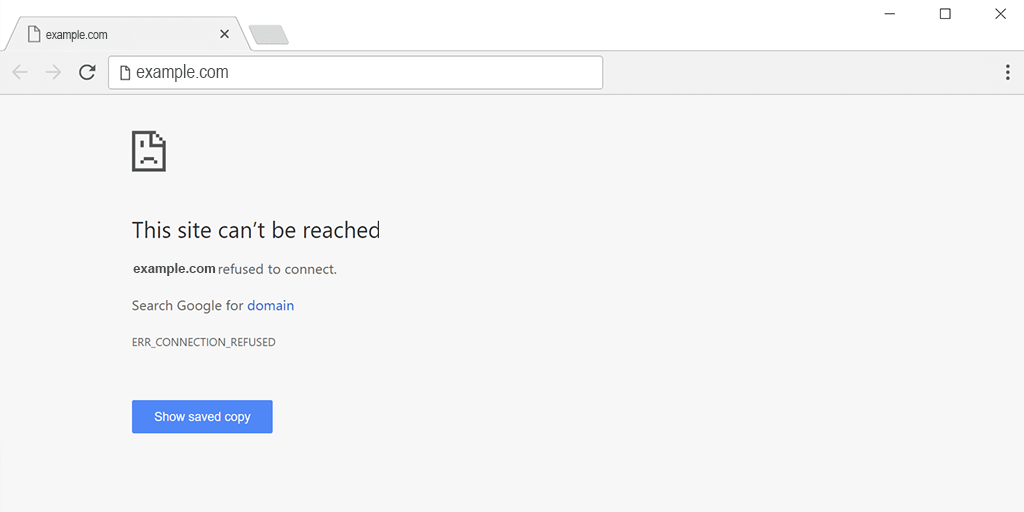
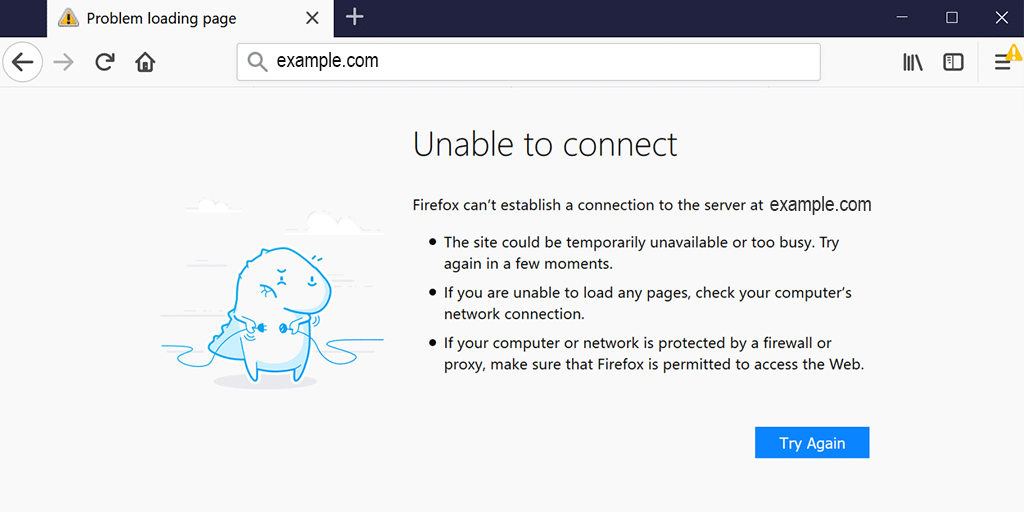
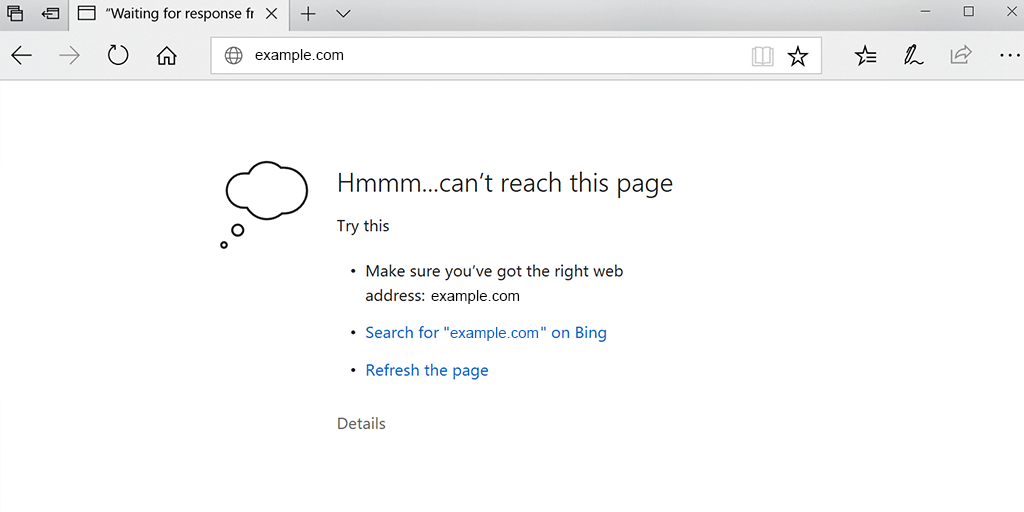
Different browsers will show different error messages, for example
In the Chrome browser, “this site can’t be reached”.
In Mozilla Firefox the error message will display as “Unable to connect”.
Microsoft Edge displays the err_connection_refused error as “Hmmm…can’t reach this page”.
Resolving this error is crucial for seamless browsing and accessing the desired content. In this blog, we will walk you through the best troubleshooting methods you can try to fix the “ERR_CONNECTION_REFUSED” error.
Read: 🚩 15 Methods to Fix 502 Bad Gateway Error on Your Website
What Causes the ERR_CONNECTION_REFUSED Error?
Understanding the possible causes of this error is essential for effective troubleshooting. While a poor internet connection and speed are among the most common causes, there are also various other reasons for the “ERR_CONNECTION_REFUSED” error, such as:
- The website’s server is experiencing technical difficulties.
- Your local network is not properly configured or has connectivity issues.
- The website’s server may have blocked your IP address.
- There may be an issue with your browser settings or extensions.
- DNS caching issues
- Antivirus and Firewall conflict
- Browser cache and cookies issues
- Incorrect Internet configuration
- Outdated Browser
Apart from the list mentioned above, the “err_connection_refused” error can also occur due to server issues. Although it is not a severe case and can be caused by a strong firewall or server settings, it can also indicate a more serious problem on the server side. This could be a sign of a malware attack or temporary server unavailability.
Like any other error message, the “err_connection_refused” error also does not provide sufficient information about the exact cause that triggers it. This means you have to identify the exact cause on your own and take the necessary steps accordingly.
Conclusion
While connection errors can certainly be overwhelming, it’s important to remember that they can be easily resolved. All it takes is identifying the potential causes and adopting the appropriate approach.
To simplify things for you, we have provided comprehensive troubleshooting steps in this post. We are confident that by following these steps, you’ll be able to troubleshoot the error effectively and regain access to the websites you depend on.
If you have any queries or would like to add any valuable points to it, please do let us know in the comment section below.
Frequently Asked Questions
How do I fix ERR_CONNECTION_REFUSED?
Follow these 10 troubleshooting steps mentioned below:
1. Refresh the webpage
2. Troubleshooting Website-Specific Issues
3. Clear browser cache and cookies
4. Disable Browser extensions or add-ons temporarily
5. Try accessing the website from a different browser
6. Troubleshoot Local network issues
7. Flush the DNS cache and Renew the IP address
8. Adjust DNS settings to use alternative DNS servers
9. Scan your computer for malware or malicious software
10. Disable any proxy settings
11. Troubleshooting Server or Hosting Issues
12. Update or Reinstall your Chrome browser
13. Additional Resources and Tips
What does error connection refused mean?
The “ERR_CONNECTION_REFUSED” error meaning is that your request to connect to a website’s server has been rejected due to some reasons.

Rahul Kumar is a web enthusiast, and content strategist specializing in WordPress & web hosting. With years of experience and a commitment to staying up-to-date with industry trends, he creates effective online strategies that drive traffic, boosts engagement, and increase conversions. Rahul’s attention to detail and ability to craft compelling content makes him a valuable asset to any brand looking to improve its online presence.

