WordPress is the best content management system for building websites of almost any type and complexity. It does not require a deep knowledge of coding, so, it is the best choice for everyone. You can install WordPress manually or, depending on your web host, can also install it in one click. While uploading the files into WordPress, you may face the “the uploaded file exceeds the upload_max_filesize directive in php.ini” error.
At WPOven you can install a WordPress site to your server in a matter of seconds and easily manage it from our dashboard. Moreover, it is very customizable: you can easily change the interface or add new functionality just by installing new themes or plugins.
How do we fix “the uploaded file exceeds the upload_max_filesize directive in php.ini” Error?

1. Editing the .htaccess file –
.htaccess is an Apache Web server configuration file. It allows you to configure the settings for individual folders and users. The .htaccess file provides a wide range of website customization. The maximum file size is one of the parameters you can set up in this file.
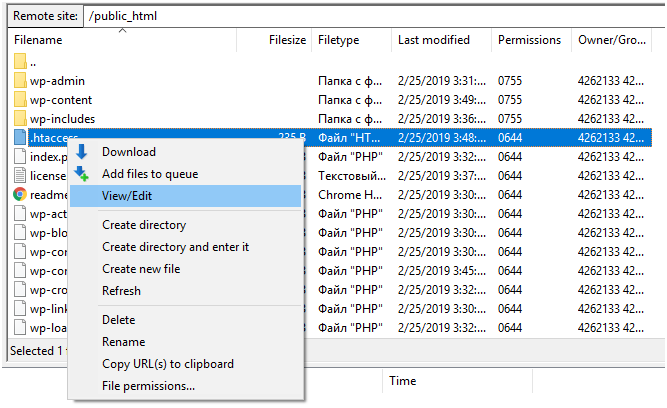
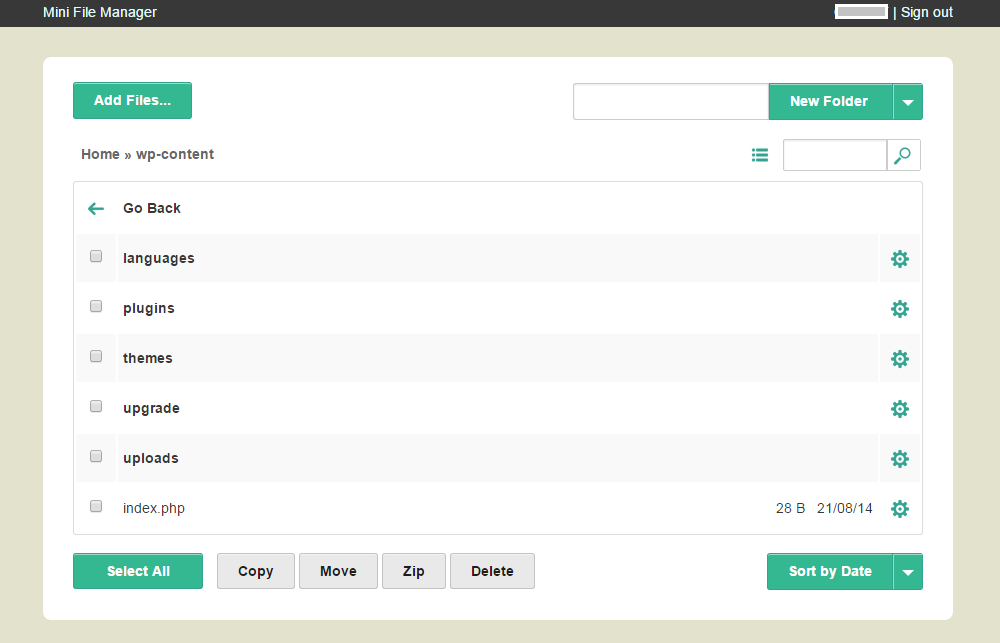
You can find the .htaccess file in the root folder of your website. To access it, you will require either an FTP manager or a web interface given by the hosting provider. In the case of an FTP manager, you will need the IP address, login, and password to connect remotely. Usually, this information is provided by the hosting service provider. If you are a WPOven user you can check out our post on, How do I use Secure FTP (SFTP) to access my site’s files and folders?
- Open the file in any text or code editor, like Sublime Text, Visual Studio Code, Notepad++, etc. Then find the upload_max_filesize line. It will look like this:
php_value upload_max_filesize 64M
- In some cases, the .htaccess file may not contain this line. Then, add it at the end of the document. Change the value to the one you really need. For example:
php_value upload_max_filesize 512M
If you did everything correctly, WordPress would not display this error anymore.
2. Edit the wp-config.php file-
wp-config.php is the main configuration file of your WordPress website. It contains all the important parameters and tools to make the website work correctly. It is also located in the website root folder. Like a .htaccess file, you will need an FTP manager or web browser if you access it online.
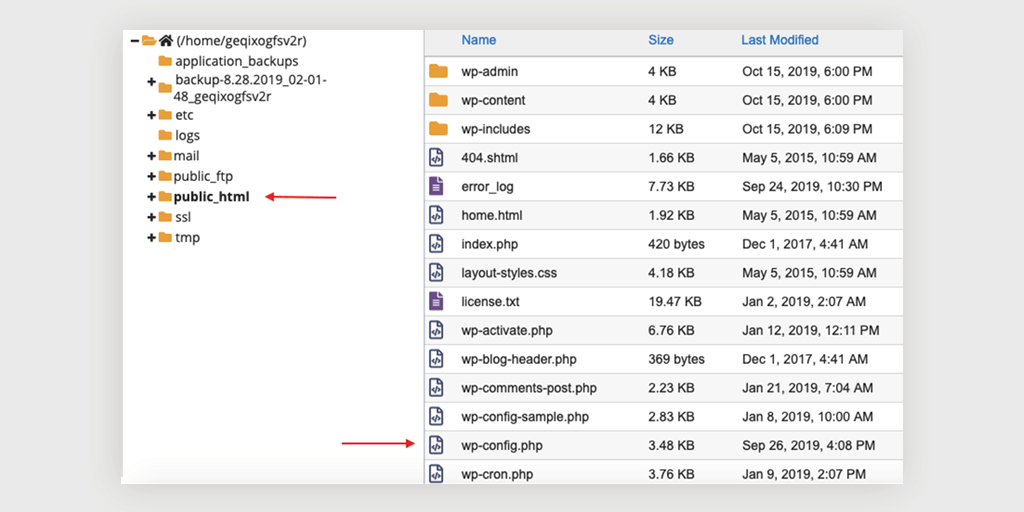
- Open the file in any text or code editor and find the following line:
define('WP_DEBUG', false);
- Right after that, add the line with the maximum file size parameter:
@ini_set('upload_max_size' , '512M' );
You can use any appropriate value instead of 512M.
- Apply the changes, upload the file back to the server if you edited it offline, refresh the page, and try to upload the file again.
- The uploaded file exceeds the upload_max_filesize directive in PHP.ini error must be now solved.
3. Edit php.ini file-
The uploaded file exceeds the upload_max_filesize directive in the PHP.ini error means that something wrong is going on with the php.ini file. First, let’s find out what this file is for.
The php.ini file is the main PHP configuration file. WordPress uses the PHP programming language, and this file controls everything. Some hosting providers set up their configuration to the maximum parameters and do not allow it to change globally. However, in most cases it is possible.
If you do not know where the php.ini file is located on the server, do the following steps:
- Start a text editor and type the following line of code in it:
<?php phpinfo(); ?>
- Save the created file and name it info.php.
- Via the FTP manager, connect to the hosting server where your site is located and copy the info.php file to the website root directory.
- Now, in the address bar of your browser type http://example.com/info.php, where instead of example.com type in your website address.
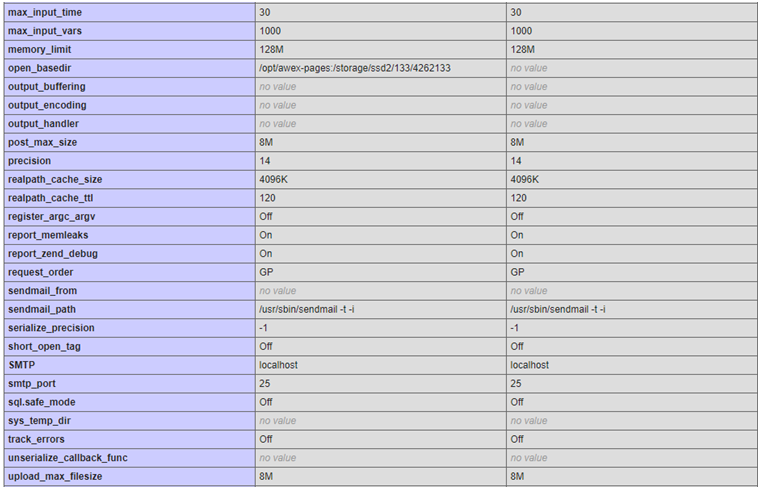
As a result, the browser displays all the information about the PHP version used on the hosting, and information about its configuration. In the Loaded Configuration File column, it will display the path to the php.ini file on the host server.
Among other settings, check the value of the following three parameters:
- memory_limit — the maximum memory size allowed by the host to run scripts on the website;
- post_max_size — allowed size of a one-time file import request;
- upload_max_filesize — the maximum amount of data that can be uploaded to the site per time.
To increase the allowed maximum file size, you need to adjust the values specified in the upload_max_filesize and post_max_size parameters. If you use virtual hosting, most likely you will not have full access to the global server settings. As a rule, full access to this file is available on the local server or on a VPS hosting.
If you have access, open the php.ini file in edit mode and set the new upload_max_filesize and post_max_size values. The upload_max_filesize value should be less than post_max_size, and the post_max_size value should not be higher than the memory_limit. Do not forget to back up the site and save a backup copy of the php.ini file before you make any changes.
It must look like the following:
; Maximum allowed size for uploaded files.
; http://php.net/upload-max-filesize
upload_max_filesize = 100M
If you do not have access to the php.ini file, adjust the necessary values in the user.ini file. The path to it is indicated in the “Additional .ini files parsed” section when opening the info.php file. This method works for PHP version 5 or higher.
- Run a text or code editor and name the file user.ini.
- Add the necessary parameters to memory_limit, post_max_size, and upload_max_filesize.
- Using the file manager, copy the user.ini file to the root directory of the site, upload the page, and try to upload the file again.
4. Contact the support-
In many cases, it will be much easier to contact the technical support of your hosting provider and ask them to solve the issue. Remember that they may possibly not be able to change the parameters if your plan does not allow you to do that. In that case, you may be required to change it.
The uploaded file exceeds the upload_max_filesize directive in php.ini error is very easy to fix. All you need is several minutes of your time and some simple steps.
Read: 🚩 You can also read our most popular posts on WordPress common errors such as DNS_PROBE_FINISHED_NXDOMAIN, 404 error, 504 gateway timeout, 403 Forbidden.
Fixed: The uploaded file exceeds the upload_max_filesize directive in php.ini Error [Complete Video]
What does this error mean? Why does WordPress display it? What are the ways to fix this error? Let’s look closer.
What is “the uploaded file exceeds the upload_max_filesize directive in PHP.ini” Error?
Depending on the platform you hosted your website on, your WordPress may have different maximum file size limits. In most cases, it is 64 MB, but sometimes it can be higher or significantly lower.
For example, in the WordPress configuration or php.ini file, you have a limit of 64 MB. And you are going to install the theme and plugin, or just upload the media file which is bigger. In this case, the server will throw the “the uploaded file exceeds the upload_max_filesize directive in php.ini” error, and you will not be able to upload the file.
What are the ways to fix the issue? We’ll review four of them in detail in the below section. But first
What Causes “the uploaded file exceeds the upload_max_filesize directive in php.ini” Error to Happen?
In order to prevent abusing server resources and preserve them, many web hosts impose certain limitations on the maximum upload file size. This maximum file size (MB or MegaByte) is mentioned or defined in the max_file_size directive.
This max_file_size directive is itself present in the default server configuration (for certain applications that require PHP) file i.e. php.ini.
Therefore, you might have noticed the terms, upload_max_filesize as well as php.ini present in the error message “the uploaded file exceeds the upload_max_filesize directive in php.ini“.
Note: You must keep in mind that this upload file limit is not imposed or set by WordPress but by your web hosting provider. However, you can easily check out this upload limit in your WordPress dashboard > media > Add new.
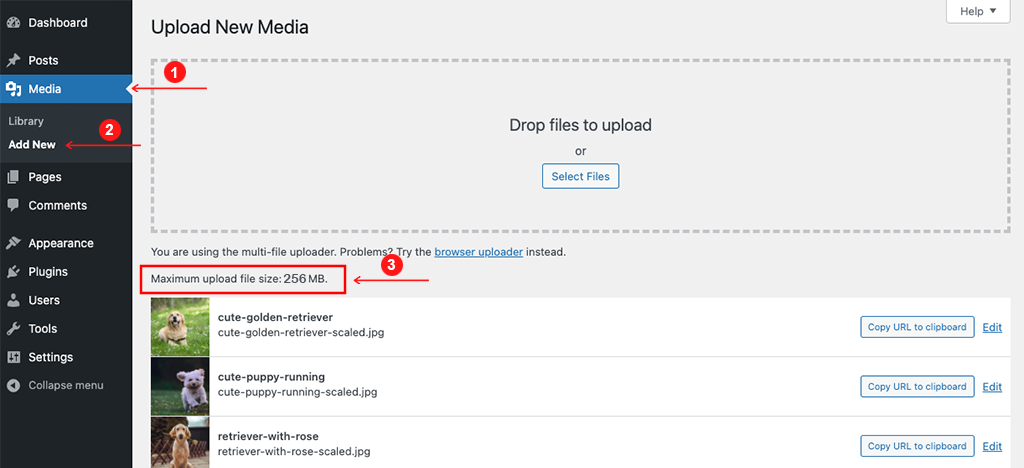
From the above picture, you can see, that WPOven sets the default maximum upload file size limit up to 256 MB, which is quite large compared to what other web hosts provide by default i.e. 4MB, 64MB,128MB and it is very unlikely you face any issue in future.
Summary
Finally, you can check or verify the changes you have made in the maximum upload file size and see if it’s working or not. To do so, go to your WordPress dashboard > Media > Add new and see if the file size limit you have applied is reflected in your php.ini file or not.
If you find everything works great and all the settings are exactly like you have made, then you should not face any “uploaded file exceeds the upload_max_filesize directive in php.ini” error while uploading a file in the near future.
However, if things don’t work as you expected and even your web host support is unable to help you for some reason, the last thing you can do is upload files through an FTP client. Since FTP has no limitations or restrictions you can upload any file size without any issue.
But the best solution we would suggest you do is migrate your website to a more reliable and trusted Managed Web host, which provides you with a larger file upload limit with more server space, i.e. WPOven.
If you have any queries or would like to share your valuable points, please do let us know in the comment section below.
No more “the uploaded file exceeds the upload_max_filesize directive in php.ini” error displaying on your screen. Host your website on WPOven and get a maximum upload file size limit than any other web host can provide. Save your time, money, and resources, and give your website mammoth growth with WPOven’s WordPress dedicated server hosting.
- Get higher SSD storage
- Higher upload file size limit
- Fastest private servers
- Website Management
- 24X7 WordPress Expert support
- High-end Security
- Datacentres around the world, etc.
You can have all these features and much more in a single plan with unlimited Free migrations, unlimited staging, and a 14-day risk-free guarantee. Check out our plans or Contact our support team which assist you in choosing the right plan.
Frequently Asked Questions
How do I change the maximum upload size in PHP.INI?
To increase file upload size in PHP, you need to modify the upload_max_filesize and post_max_size variables in your php.ini file. In addition, you can also set the maximum number of files allowed to be uploaded simultaneously, in a single request, using the max_file_uploads
Where do I upload the PHP.INI file?
For a list of ini directives, please visit http://www.php.net/manual/en/ini.list.php. For more information about the upload_max_filesize directive, please visit http://www.php.net/manual/en/ini.core.php#ini.upload-max-filesize
Where is my PHP.INI file?
ini file is the default configuration file for running applications that require PHP. It is used to control variables such as upload sizes, file timeouts, and resource limits. This file is located on your server in the /public_html folder.

I am a Co-Founder at WPOven INC currently living in Vancouver, Canada. My interests range from Web Development to Product development and Client projects. I am also interested in web development, WordPress, and entrepreneurship.





Great information for WordPress users. By reading this article, I got a clear idea about why the uploaded file exceeds the max file size. You nicely showed the solution which made this easier to understand.