Cloudflare is one of the leading CDN providers worldwide that is best known for its largest network of data centers (more than 100) located across the globe, top-notch security measures, DNS services, and DDoS protection.
This is why, Cloudflare has become almost every website owner’s first choice with a Cloudflare market share of more than 80%.
You might be surprised to know that some of the big tech giants such as Google and Microsoft also rely on Cloudflare for its services.
Similarly, if you want a performance, speed, and security boost for your WordPress site, go for Cloudflare’s ultimate solution.
The best part is, that Cloudflare offers a Free plan which is a basic but great option for beginners to boost website performance and security features. However, If you need more, you can always upgrade to a higher-tier plan.
Important Note: WPOven is a certified Cloudflare partner, which means a seamless Cloudflare integration through the dashboard directly without any additional cost. To learn more, read out our dedicated post on “WPOven is now a CloudFlare Certified Partner“.
SignUp with Cloudflare and Installation
Without any further delay, let us dive into the complete Cloudflare signup and setup process step by step.
Step 1: First go to Cloudflare’s website and click on the sign-up button, the page will redirect to the pricing page where first you to select “Zero Plan” and click on the “Add site “button.

Step 2: After that the page will redirect you to a sign-up page where you are required to provide an Email and verify it, then log into Cloudflare so that we get started with moving our DNS over to Cloudflare so that we can start using it with our website.

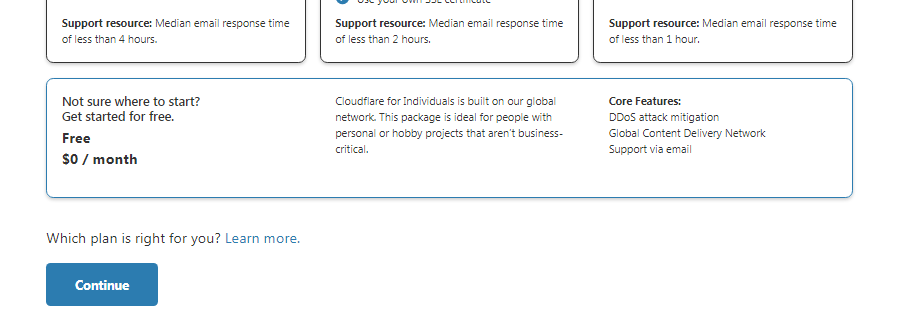
Step 3: Once signed up, you will see an add site form, here we will add our site let’s say it is yourdomain.com. Click Add Site, and then this will take you to the plan selection –

Select the Free plan for now, which we will cover in this Guide in detail. This is also sufficient for many of the common types of sites we see users run.
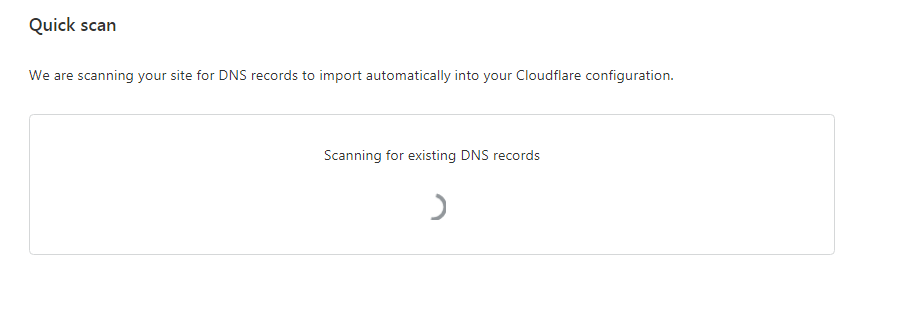
Cloudflare will then take some time to import the existing Name Server entries, this process can sometimes take a bit of time, so have patience.
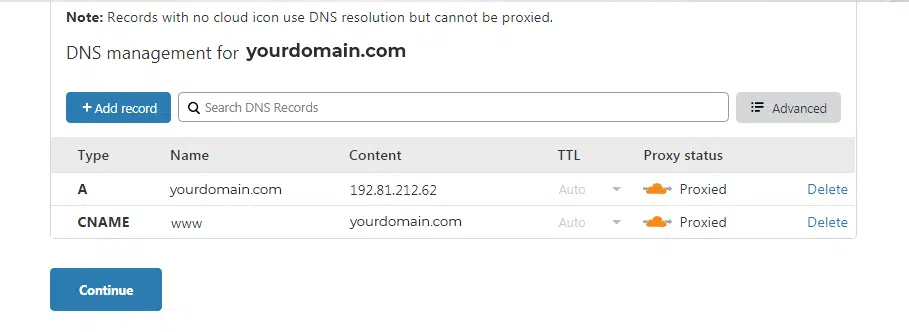
Once done, expect to see a list of name server entries. You may change them as required by your setup, but we will let them be as they look fine for now.
Cloudflare will ask you to change the name server records on your domain registrar so that it can take over the functionality of a DNS server and start acting as the front end of your website.
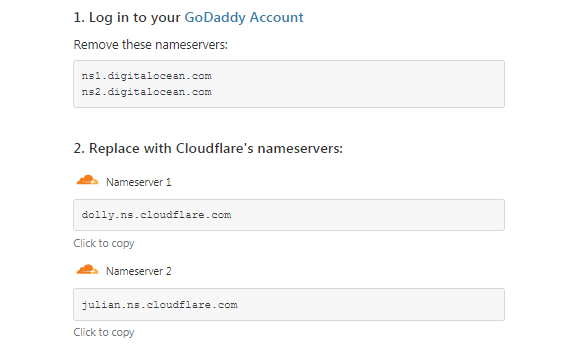
Step 3: The final step is to change the default nameserver and use Cloudflare-provided name servers. This will be different for each Domain Registrar. Cloudflare will next run you through a small Quick Start Guide, and we will run through the defaults as they are sufficient and finish the setup.
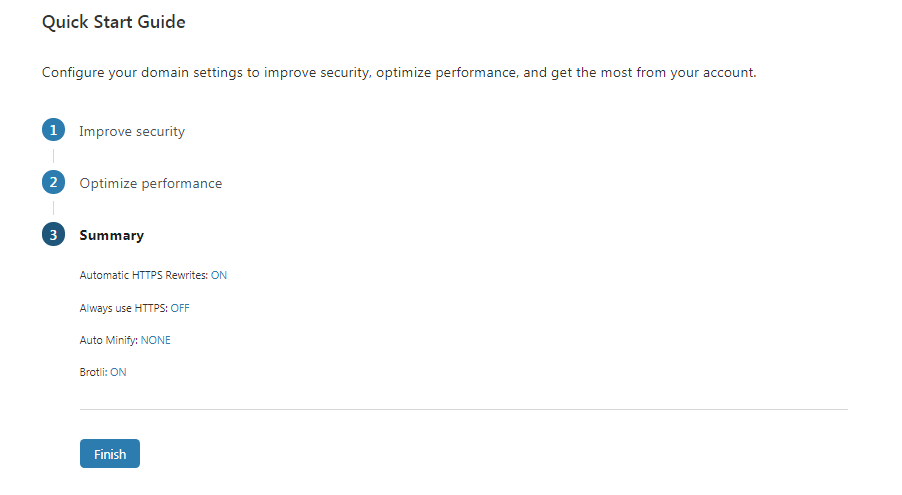
Step 4: If all went well you will arrive at a screen something like given below and we can get started with optimizing Cloudflare for our WordPress website.
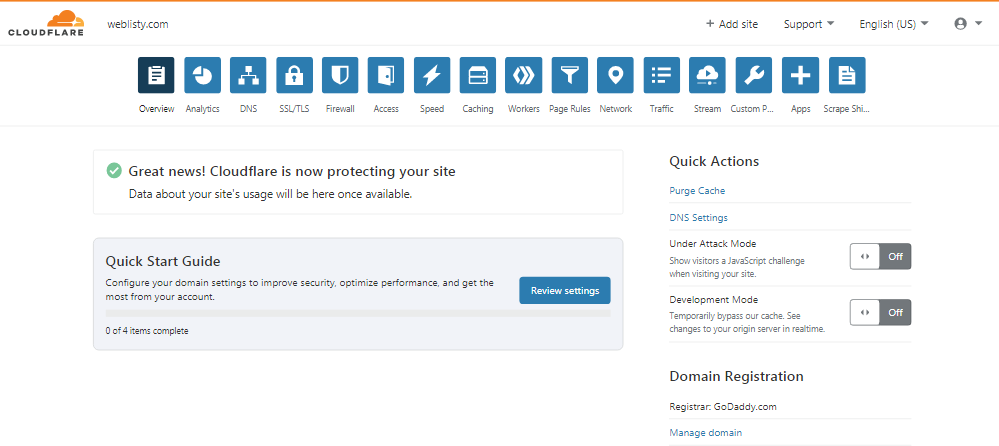
Now, your WordPress site has been successfully installed Cloudflare. But we are not done yet, there are still certain things that need to be done from your end to run Cloudflare properly. This step is purely optional but for optimum performance, it is highly recommended.
Step 5: Install the Cloudflare official Plugin to your WordPress Site.
Like any other WordPress Plugin you install on your WordPress site, installing the Cloudflare plugin is the same. You can download it directly from the WordPress repository or install it via your WordPress dashboard under the “Add new” section.
This dedicated plugin has its benefits and possesses some of the features like:
- Automatic cache management: The plugin automatically manages the cache to ensure your website loads quickly and efficiently.
- Content Delivery Network (CDN): Cloudflare’s CDN distributes your content across a global network of servers, reducing load times and improving user experience.
- Web Application Firewall (WAF): The plugin includes a WAF to protect your website from malicious traffic and attacks.
- DDoS protection: Cloudflare’s DDoS protection helps prevent your website from being taken down by large-scale attacks.
- Automatic HTTPS: The plugin automatically enables HTTPS on your website, ensuring secure connections for your visitors.
- Analytics: You can easily check all the data about bandwidth usage, total visitors and block threats if any.
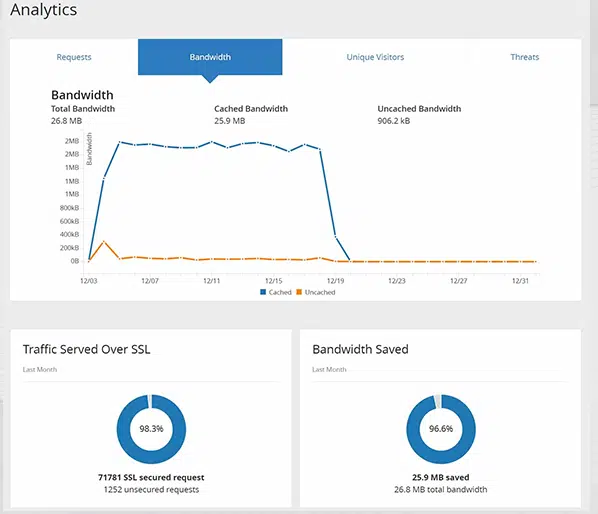
You can easily access all these features directly from your WordPress dashboard, so there’s no need to log in to your Cloudflare account separately to manage them.
When successfully installing the Cloudflare plugin, you need to insert your email ID and API key.
For the API key, you can check out the link here and generate the Global API key. Copy it and insert it in the field shown in the image below:
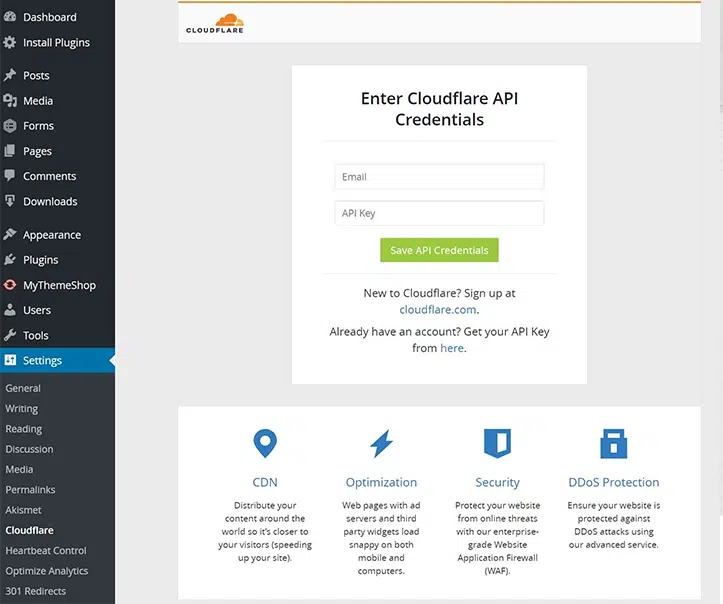
After that click on the “Save API Credentials” button and you are done.
Some Cloudflare Plugin Essentials
Once you set Cloudflare’s official plugin on the WordPress site, you can check out some of its features such as:
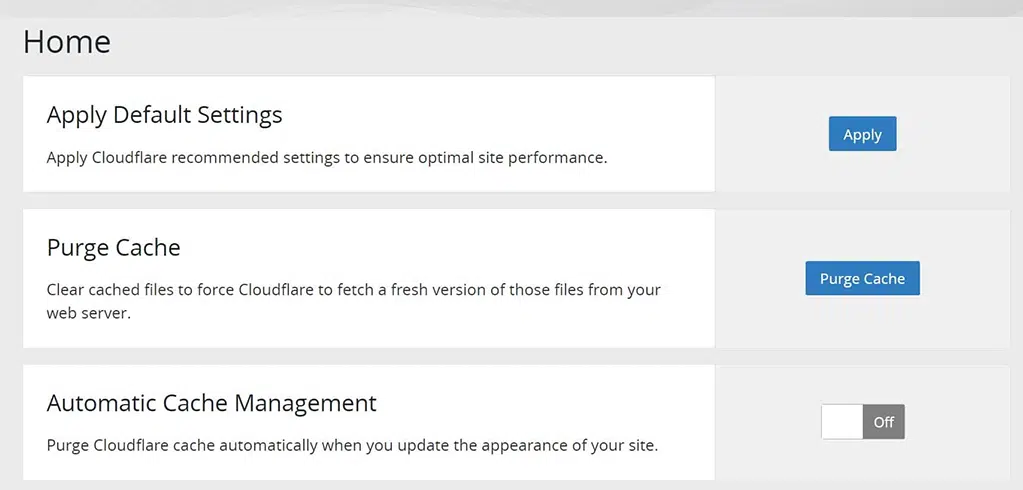
1. You can use the Home tab to either choose the Apply Default Settings option, Purge Cache, or Turn On/Off the Automatic Cache Management.
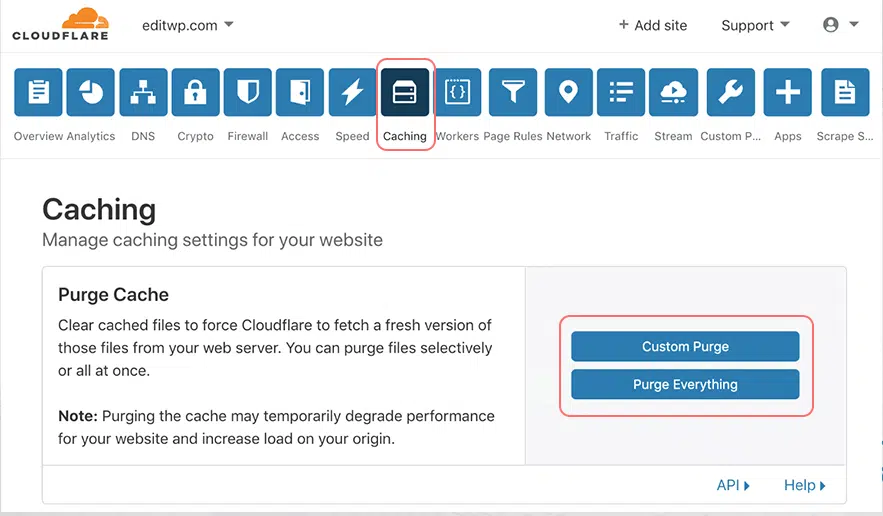
Note: you can directly clear/purge the cache from the Plugin itself. However in case you are unable to access your WordPress dashboard, alternatively you can do this via Cloudflare’s panel. To do so, log in to your Cloudflare account and click on the “Caching tab” as shown below. You will be provided with two options, one is custom purge in which you can purge the cache of individual files and another one is Purge Everything which clears all your cache files, it may degrade the performance for a while but is worthwhile.
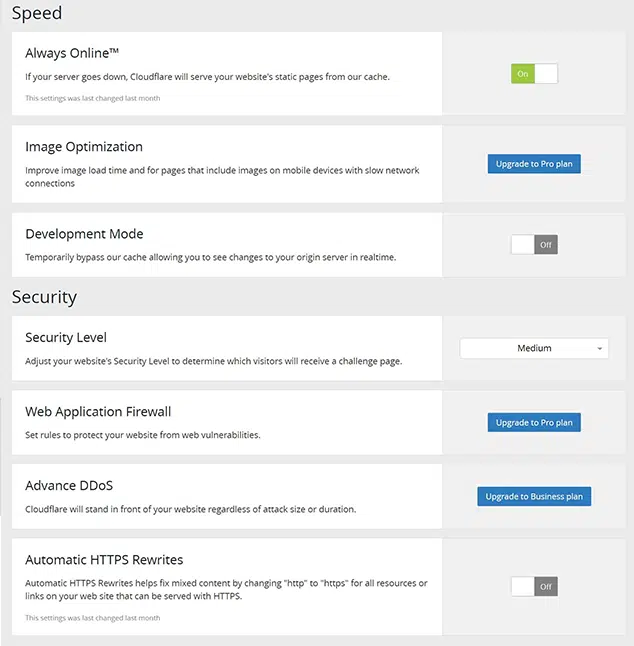
2. In the “Settings” section, you can make pictures load faster if you have a pro plan, activate development mode, adjust security settings, and switch on automatic HTTPS rewrites.
3. In the “Analytics” part, you can see how many times your site is visited, how much data is used, and if there are any threats to your WordPress site.
Some Common Cloudflare errors and their Fixes
Since you have integrated Cloudflare with your WordPress site, there are chances that you might encounter some errors that you must be familiar with and know how to troubleshoot as soon as possible. Here is a list of posts that can help you out with this.
- How to Fix Cloudflare Error 521? 8 Quick Methods
- How to Fix Error 1016 Cloudflare? (6 Methods)
- How to Fix Cloudflare’s Access Denied Error Code 1020? (14 Ways)
- How to Fix “SSL Handshake Failed” or “Cloudflare 525” Error?
- How to Fix Cloudflare Error 522: Connection Timed Out? (11 Solutions)
- How to Fix Cloudflare Error 524: A Timeout Occurred?
- How to Fix 502 Bad Gateway Error? (Ultimate Guide)
Summary
That’s it. If you want to give your WordPress site a performance and speed edge, along with an extra layer of protection, Cloudflare is one of the best free services you can find.
While installing Cloudflare on your WordPress site might be a little technical, trust us, it’s worth it. It’s merely a one-time process, but the features and benefits you receive are undeniable.
To summarize the installation process, it’s just three steps:
- Sign up for free with a Cloudflare account.
- Change your domain’s nameservers to Cloudflare’s.
- Install the Cloudflare plugin on your WordPress site integrate it with the Cloudflare API token and configure it.
If you have any queries or doubts regarding the Cloudflare installation process, feel free to write in the comment section below.
Frequently Asked Questions
How do I add Cloudflare to WordPress?
You need to first install Cloudflare’s official WordPress plugin. For this Go to Your WordPress dashboard > Plugins > Add New and search for the Cloudflare WordPress plugin. Click Install Now and Activate Cloudflare.
Is Cloudflare compatible with WordPress?
Yes, Cloudflare is compatible with WordPress. In fact, many WordPress users choose to integrate Cloudflare into their websites to improve performance, security, and reliability. Cloudflare offers a WordPress plugin that makes integration easier, allowing users to manage their Cloudflare settings directly from their WordPress dashboard. This integration helps optimize website speed, enhance security features, and mitigate DDoS attacks, among other benefits.
Is Cloudflare free to use?
Yes, Cloudflare offers a free plan that provides essential features such as CDN (Content Delivery Network), DDoS protection, and SSL/TLS encryption. This free plan is suitable for personal websites or small businesses looking to improve their website’s performance and security. Additionally, Cloudflare offers paid plans with advanced features and more extensive support options for larger businesses or websites with higher traffic volumes.

Rahul Kumar is a web enthusiast, and content strategist specializing in WordPress & web hosting. With years of experience and a commitment to staying up-to-date with industry trends, he creates effective online strategies that drive traffic, boosts engagement, and increase conversions. Rahul’s attention to detail and ability to craft compelling content makes him a valuable asset to any brand looking to improve its online presence.

