Are you looking for answers regarding Error 409 and how to fix it? Then you have landed on the right post. Sometimes, when you make a request, you might encounter an error message acknowledging that the request cannot be completed. Generally, these errors are accompanied by additional information showing what possibly happened.
For example, Error 400 Bad request is a client-side error that triggers due to incorrect formatting, corrupt browser cache, etc.
Similarly, Error 409 can occur due to a conflict in the HTTP request, which we shall discuss more in this post along with its meaning and various troubleshooting methods in a comprehensive way. Stay tuned and keep reading until the end.
What is Error 409 or “409 conflict”?
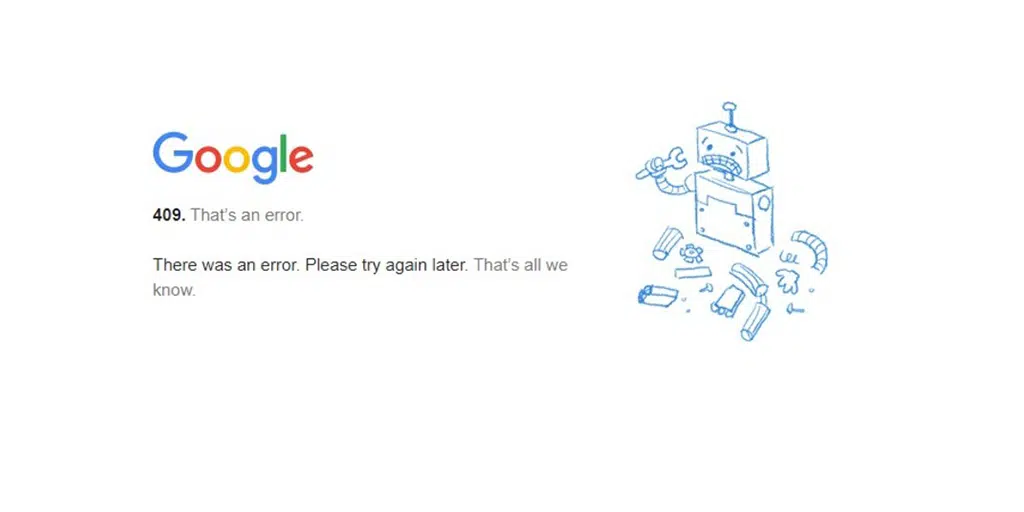
The HTTP error 409 is a series of 4XX error codes that means the request made by the client cannot be processed due to a conflict or incompatibility with the present state of the target resource or server. The response from the server may contain an additional message that can help to resolve the conflict.
How to fix HTTP 409 error?
Even though error 409 might look very sophisticated to some individuals, the troubleshooting methods are quite simple and easy. Check out the best 6 methods below. Check out the list.
1. Refresh the website
Sometimes, the error 409 can be temporary and disappears after some time. It can be due to a temporary glitch or the website admin could have already fixed it.
2. Check the URL in the PUT request
Error 409 can trigger when you enter the wrong information in the PUT request. When updating or creating a resource on the server, you want to ensure that you have entered its correct destination.
And before you try other lengthy troubleshooting methods, it would be better if you start by rechecking and verifying the requesting URL.
In case you find any discrepancies or errors in this data, rectify it and try to request again.
3. Delete your Browser Cache
Whenever you visit a website, the browser has the tendency to store some of the data or information of that particular website in the form of a cache. The next time you visit the website again, instead of loading the website data from the server, your browser will use the cache memory to load the page.
Therefore, even though you have rectified the issue in your PUT request, the error might appear again. To fix this, you can delete your browser cache.
If you are a Chrome user, follow the steps given below.
- Open Chrome.
- Click on More Settings
- Next, click on Advanced.
- In this menu, find ‘Content settings’ Under “Privacy and Security”
- Click on ‘Cookies’.
- Under “All cookies and site data,” search for the website’s name.
- To the right of the site, click Remove
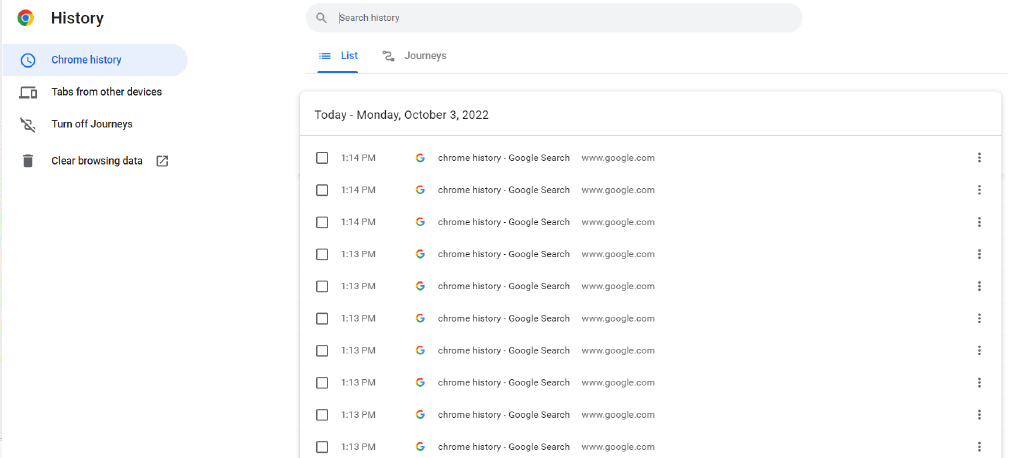
To clear all the cookies, you can just go to Google Chrome History, and delete the Cache completely. A similar process can be followed in other leading web browsers.
Go to History, and click on Clear Browsing Data as shown below:
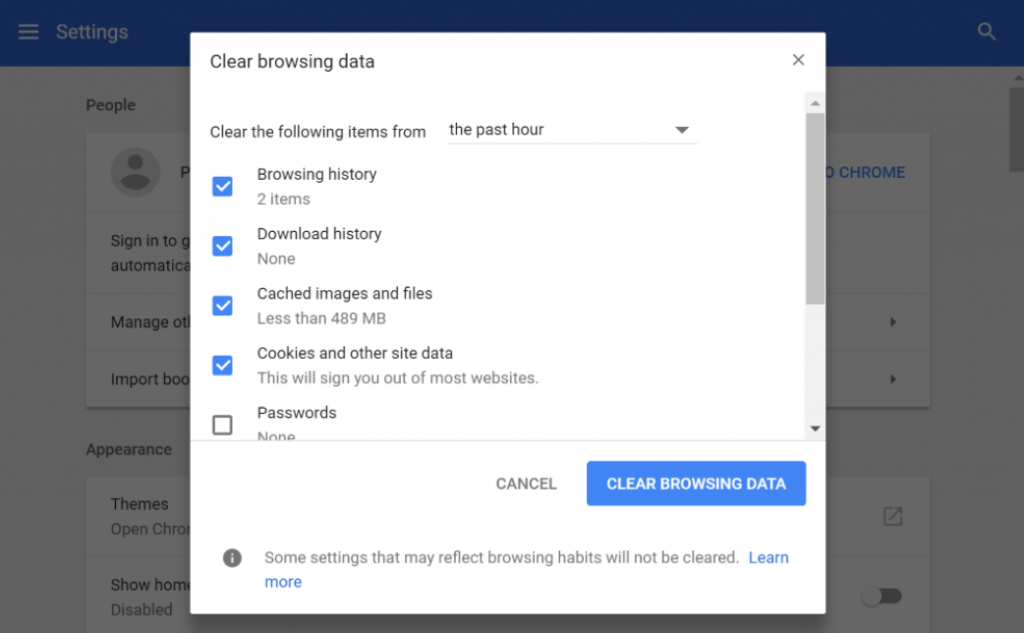
You can select the time range, select the option of Cookies and other site data, select Cached Images and files, and then click on the “Clear data” button.
4. Deactivate Chrome Extensions
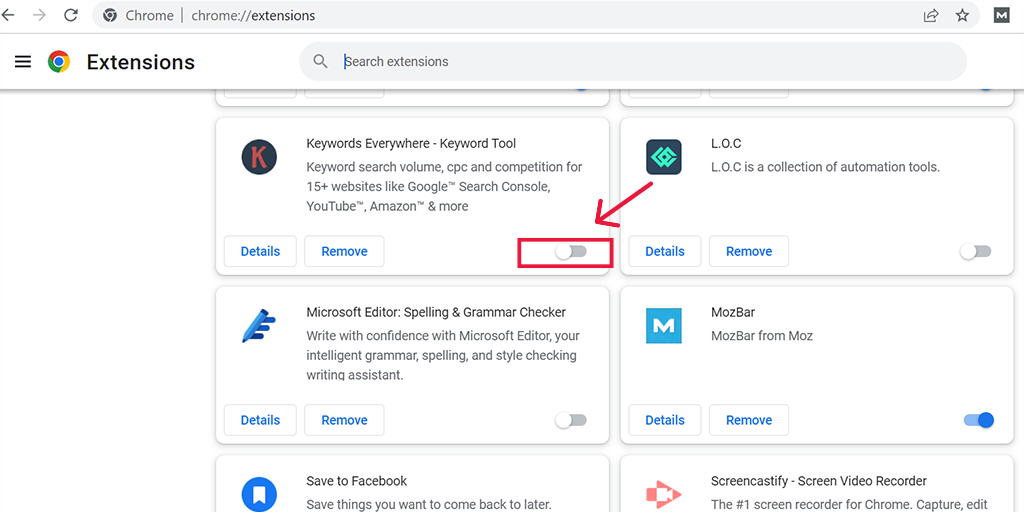
It is also seen that some Chrome extensions that you have installed might also be responsible for triggering the error 409. The best thing you can do is to disable all of the installed Chrome extensions and see if the problem has been fixed.
If it does, then enable each extension one by one and simultaneously try to access the website again and again. This way you will be able to find out the exact faulty Chrome extension that causing the conflict.
Once you figure out the culprit, delete it, and you are done.
To view and manage all your Chrome extensions, you can use this shortcut by simply putting the address “chrome://extensions/” in the address bar or by going to settings > Extensions.
5. Downgrade the WordPress versions
Sometimes, the HTTP error code 409 can also trigger due to incompatibility with the latest WordPress version you have installed. To fix this issue, the best thing you can do is to downgrade the WordPress version and check if this causing the issue.
Note: Before proceeding to downgrade the WordPress version, make sure you create and save a backup file of your website first.
To downgrade the WordPress version of your website, the best and hassle-free method you can follow is to use a WordPress plugin named ” WP Downgrade “.
6. Check server logs
The last method you can follow is to check your server error logs. This will help you to figure out the exact cause of the issue that triggered the error and you can proceed accordingly to fix it.
Read: 🚩 How to Set up and Use WordPress Error Log?
What causes Error 409?
Triggering Error 409 while users accessing your website might be concerning from an SEO point of view and also disrupt your website functionality. This is why it is very important for you to understand what causes this error so that you can avoid happening in the future.
Here are some of the causes of Error 409 you must check out.
1. Discrepancies in PUT request
Generally, the main reason for occurring a 409 error is found to be in response to a PUT request. It is an HTTP method used to request to replace the existing one or create a new resource on the server.
But if you have made some error or entered a wrong URL in the PUT request the server will directly reject the request.
2. Version control conflict
If you try to upload an older version file to your website than the current one, due to incompatibility issues, it can display a 409-conflict error.
3. Recurring Conflict Status
If the error shows “Recurring HTTP 409 “, it might show that there is an issue with the server configuration or that the requested resources are not available.

Summary
The conflict 409 error shows a compatibility issue or conflict between a client’s request and the server’s state. If it ever happens to your website, it can severely impact your all SEO efforts and you definitely don’t want it to happen.
To best tackle this, regularly monitor or audit your website using various tools such as Google Search Console or any SEO tool such as SEMrush.
You can follow the simple and easy troubleshooting steps listed below.
- Refresh the website
- Check the URL in the PUT request
- Delete your Browser Cache
- Deactivate Chrome Extensions
- Downgrade the WordPress versions
- Check server logs
If you have any queries or suggestions, please do let us know in the comment section below.
Frequently Asked Questions
How do I fix 409 Conflict error?
You can easily fix 409 Conflict errors by following these methods.
1. Refresh the website
2. Check the URL in the PUT request
3. Delete your Browser Cache
4. Deactivate Chrome Extensions
5. Downgrade the WordPress versions
6. Check server logs
What is a 409 error code?
The HTTP error 409 is a series of 4XX error codes that means the request made by the client cannot be processed due to a conflict or incompatibility with the present state of the target resource or server. The response from the server may contain an additional message that can help to resolve the conflict.

Rahul Kumar is a web enthusiast, and content strategist specializing in WordPress & web hosting. With years of experience and a commitment to staying up-to-date with industry trends, he creates effective online strategies that drive traffic, boosts engagement, and increase conversions. Rahul’s attention to detail and ability to craft compelling content makes him a valuable asset to any brand looking to improve its online presence.

![How to Fix 400 Bad Request Error in Google Chrome? [8 Quick Fixes] 400 Bad Request](https://www.wpoven.com/blog/wp-content/uploads/2023/05/400-Bad-Request.png)
