Launching or making a website live can be quite intimidating, especially for beginners who have no idea about the ABCs of websites. Fortunately, there are web hosting services that provide staging platforms, allowing you to practice how to make a website live on WordPress. These platforms offer a safe environment for experimentation and learning.
From an online business perspective, launching a website and ensuring its accessibility to the public is crucial. When it comes to choosing a content management system (CMS), there is no better option than WordPress. It is a highly popular and user-friendly platform for creating websites.
In this comprehensive guide, you will learn how to make a website live on WordPress from scratch.
Read: 🚩 How to Create a WordPress Website for Beginners Free.
1. Preparing for Website Launch
The first and foremost step is to get prepared for a website launch. The initial steps would mainly consist of:
1.1 Choosing a Reliable Web Hosting Provider:
Choosing a reliable web hosting provider is essential for the optimal functioning of your website, especially if you’re using WordPress. A web host is a company that provides the infrastructure and resources required to make your website accessible on the internet. Every website needs a host to work to consider factors when selecting a hosting provider and explore recommended options for WordPress websites.
A web host is necessary to store and serve your website’s files, databases, and content on a server connected to the internet. Without a hosting provider, your website won’t be accessible to users.
Read: 🚩 How to Host A Website Like A Pro in 2023?
1.2 Registering a Domain Name
Registering a domain name is an important step in establishing your online presence. It gives your website a unique identity and makes it easily accessible to users. Here’s a short note on registering a domain name and choosing a memorable and relevant one:
To register a domain name, follow these steps:
- Choose a reputable domain registrar like GoDaddy or Namecheap.
- Search for domain availability and select a relevant extension.
- Provide accurate contact information during registration.
- Complete the process by making the necessary payment.
- Consider multi-year registration for long-term security.
Here are tips for choosing a memorable and relevant domain name:
- Keep it simple and easy to remember.
- Make it relevant to your website’s purpose or industry.
- Consider using keywords or location-based terms.
- Avoid trademark infringement by conducting a search.
- Choose a brandable name for future recognition and expansion.
Take your time to select a domain name that represents your brand effectively and aligns with your long-term goals.
1.3 Installing WordPress on Your Hosting Server
If you are following the most conventional way to create a website, which involves designing the website directly through the WordPress CMS on web hosting installation, the first and most important step you need to take is to install the WordPress CMS on your web hosting server.
You can do it easily through a one-click installation or by following a manual setup guide. Once WordPress is installed, you’ll access the WordPress dashboard, which is where you manage your website.
Note: Some web hosting service providers, like WPOven, provide pre-installed WordPress along with their web hosting setup.
The WordPress dashboard has some key features:
- Posts and Pages: You can create and manage your website’s content.
- Themes: Choose a design for your website from a variety of options.
- Plugins: Add extra functionalities like contact forms or social media integration.
- Customization: Customize your website’s look and layout.
- Settings: Configure various aspects like site title and comment settings.
Understanding the WordPress dashboard is important to effectively manage and customize your website. Whether you choose a one-click installation or manual setup, installing WordPress and exploring the dashboard will help you create and maintain your website easily.
But before designing the website, I would suggest installing an “Under Maintenance” plugin that will put your website in maintenance mode for visitors as well as discourage the search engines from indexing your website.
To discourage search engines from indexing your website, you can follow these steps:
- Adjust the reading settings: In the WordPress dashboard, navigate to “Settings” and then “Reading.” Check the box that says “Discourage search engines from indexing this site.” This adds a “noindex” tag to your website, indicating to search engines that you prefer not to be indexed.
- Use a robots.txt file: Create a robots.txt file and place it in the root directory of your website. The robots.txt file instructs search engine crawlers on which pages to crawl and which ones to exclude from indexing. Include the following directive to disallow indexing: “User-agent: * Disallow: /”.
- Install an SEO plugin: Install an SEO plugin like Yoast SEO or All in One SEO Pack. These plugins provide additional options to control search engine indexing. In the plugin settings, look for options related to indexing and make sure to set them to discourage indexing or add noindex tags to certain pages.
- Manage individual page settings: For specific pages or posts that you don’t want search engines to index, you can edit the page settings. Within the WordPress editor, look for options like “Visibility” or “Indexing” and select “noindex” for those specific pages.
Read: 🚩 How to Build A Website with WordPress in 11 Easy Steps?
2. Designing Your Website
Before proceeding to designing your website, if you want to design your website on a staging platform check out the links given below:
- How do I create a Staging / Test site?
- Sync the changes of the WordPress Staging Site to the Live Site
Now, if you are able to create a Staging or Test site, follow the steps given as provided.
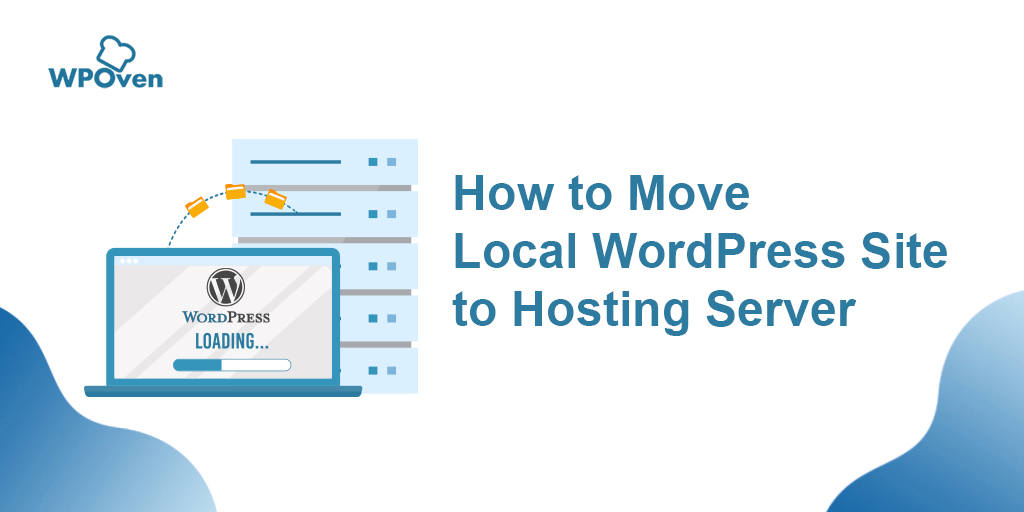
If you are following this method, it will be very easy for you to make your website live directly from the dashboard. However, if you have already created or designed a website on your computer on a local server, there are some methods you need to follow.
Why Do You Need to Migrate Your Website from a Local Server to a Live Website?
Just like a staging environment, creating a WordPress website or WordPress blog on a local server offers the same benefits. You can conduct unlimited experiments or testing without impacting your visitors.
It is also a common practice to work on your website privately.
But after completion, finally, you have to make it live on the liver server for your visitors. Let us see how to move WordPress from a local server to a live website.
- Manually transfer your Website
- Using WordPress Duplicator Plugin
- Using Export/Import WordPress Feature
How to Move WordPress from Local Server to Live Website: Manual Method
Suppose you have completed all the preparations for launching your website, as discussed in the previous section. The additional steps for manually transferring your website from the local host to the live server are as follows:
- Install an FTP client on your computer. This tool will allow you to access your website files and upload your local server site to the live server.
- Ensure that you have full access to your local server.
Now let’s start the migration process.
Step 1: Download or Export Your Local Database
1. Export your local WordPress database. To do this, we will use a tool called phpMyAdmin. If you’re not familiar with it, you can refer to our guide on managing WordPress databases using phpMyAdmin.
2. Open your web browser and go to http://localhost/phpmyadmin/. This will take you to the phpMyAdmin interface.
3. Once you’re in phpMyAdmin, locate and click on your WordPress database from the list.
4. In the top menu bar, click on the ‘Export’ button.
5. On the export page, you will see an option called ‘Export method:’. You can choose between ‘Quick’ or ‘Custom’. For simplicity, we recommend selecting ‘Quick’.

6. After selecting ‘Quick’, click the ‘Go’ button. This will start the export process and your database will be downloaded to your computer.
Step 2: Upload WordPress Files to the live server
1. To move your WordPress website files to the live site, you’ll need an FTP client such as FileZilla. Open your FTP client on your computer.
2. Connect to your web hosting account using the FTP client. You will need to enter your FTP credentials, which are usually provided by your web hosting provider.
3. Once you’re connected to your live site through the FTP client, ensure that you upload the files to the correct directory. For instance, if you want your site to be hosted on ‘yourdomain.com’, you should upload the files to the ‘public_html’ directory.
4. In your FTP client, select the WordPress files that you have on your local computer.
5. Upload the selected files to your live server by clicking the appropriate button in the FTP client. This will initiate the transfer of your files to the live server.
Step 3: Create MySQL database on your Live server
When your FTP client is uploading the WordPress Files, you can begin importing your database to the live server.
Now go to your Web hosting account’s cPanel dashboard and look for the “Database section”.
Once you are able to locate the Database section click on the ‘MySQL Database Wizard” icon.

Select the option for creating a new database > Provide a name for your database and click on the “Next Step” button.

Wait for cPanel to automatically create the new database.
Now enter a username and password for the new user and click “Create user”.

Add the newly created user to the database by checking the ‘All Privileges’ checkbox.

Scroll down and save your changes by clicking ‘Make Changes’ and you are done.
Step 4: Import the earlier downloaded database to the live server
Access your cPanel dashboard and scroll down to the ‘Databases’ section. Click on ‘phpMyAdmin‘.
You will be redirected to phpMyAdmin. Select the database you created earlier. The newly created database will be shown without any tables.
Click on the ‘Import’ tab located in the top menu. On the import page, click the ‘Choose File’ button and select the database file saved from your local site in the first step.

After selecting the file, click the ‘Go’ button at the bottom of the page. Your database will be automatically imported to phpMyAdmin.
Step 5: Change your Website’s URL
Now, it’s time to change the site URL in your database to connect with your live WordPress site.
In phpMyAdmin, locate the wp_options table in the database you imported.
Note: If you modified the database prefix, the table name may be {new_prefix}_options instead of wp_options.
Click on the ‘Browse’ button next to wp_options or use the sidebar link to access the page listing the fields within the wp_options table.

Look for the option named ‘siteurl’ in the options_name column and click the ‘Edit’ icon next to it.
A window will appear where you can edit the field. In the input box for option_value, you will see the URL of your local installation, typically something like http://localhost/test.
Replace the existing URL with the new site URL, such as https://www.newurl.com.

Save the field by clicking the ‘Go’ button.
Repeat the same steps as above for the ‘home’ option name. Since the wp_options table can have multiple pages, you may need to navigate to the second page to find the ‘home’ option.
Update the ‘home’ URL to match your live site URL.
By following these steps, you can successfully import your WordPress database and modify the site URL to connect with your live site.
Please note that this rephrased version conveys the same information as the original text in simpler terms and is free from any plagiarized content.
Step 6: Update Database Details in the Wp-config.php file
After importing the database and uploading your content, you may encounter an ‘Error establishing a database connection‘ message on your site.
To resolve this issue, connect to your website using an FTP client and open the wp-config.php file.
Look for the following lines of code in the wp-config.php file:
// ** MySQL settings - You can get this info from your web host ** //
/** The name of the database for WordPress */
define( 'DB_NAME', 'database_name_here' );
/* MySQL database username */
define( 'DB_USER', 'username_here' );
/* MySQL database password */
define( 'DB_PASSWORD', 'password_here' );
/* MySQL hostname */
define( 'DB_HOST', 'localhost' );
Replace ‘database_name_here’ with the name of your database, ‘username_here’ with the MySQL database username you created earlier, and ‘password_here’ with the corresponding password.
Save the wp-config.php file and upload it back to your WordPress hosting server.
After uploading, visit your website. It should now be live without the ‘Error establishing a database connection’ error.
Log in to your WordPress admin panel and navigate to Settings » General.
Without making any changes, scroll to the bottom of the page and click the “Save Changes” button.
This action ensures that your site URL is corrected in all necessary places.
Next, go to Settings » Permalinks. Scroll down the page and click the “Save Changes” button to ensure that all post links are functioning properly.
Step 7: Ensure broken links are fixed
When you try to migrate your WordPress website from one domain to another or move from the local server to the live site, there is a higher possibility of encountering broken links.
That might result in a 404 Error, therefore you need to make sure that all the broken links are fixed and updated.
To do this, Go to your WordPress dashboard > Settings > General.
Check and verify that both Your WordPress address and Website Address point directly to your domain name. After that click on the “Save Changes” button.
Now, go to Settings > permalinks > Click on the “Save changes” button.
Step 8: Fix Images and Links by updating their paths
At this point, your WordPress website will be live, but the process has not been completed yet. Your posts and image links might be broken (as already mentioned in the above section) and will not work either.
However, there is an easy solution to fix this, all you need to do is to just add a SQL query to your database.
To do this, Go to your phpMyAdmin, Select and click on your new database >, and click on SQL at the top of the menu bar. And add the following SQL query:
UPDATEwp_postsSETpost_content =REPLACE(post_content, 'localhost/test/', 'www.yourdomain.com/');

Note: Do not forget to replace “localhost/test/” and “www.yourdomain.com/” with your own website details.
Transferring your website using WordPress Duplicator Plugin
This method is one of the easiest and beginner-friendly. There is no better shortcut method than creating a complete clone of your website and making it live instead of moving from the local server to the live site.
To do this, all you need is to install a simple WordPress plugin called the “Duplicator Plugin.” It is one of the most popular and widely used plugins that help you create a complete clone of your website and easily import it onto your hosting.
1. The first thing you have to do is to Install and activate the Duplicator plugin directly from the WordPress directory.
2. After activation, Go to Duplicator > Packages and Click on the “Create New” button.

3. A new page will appear, where you have to provide the name for your Backup, say ” Live Site Backup” followed by clicking on the “Next” button.

4. Now, the Duplicator plugin will run a scan to verify if everything is in order or not.
5. If the Scan results turned out to be okay and all the items are marked Good, proceed further by clicking on the “Build” button.

6. This may take a while to process, depending on the size of your website. It is better to keep the tab open until the process is finished.
7. When the process is finished, you need to download, Installer as well as Archive file. Click on the ” One-click download” button and both files will be automatically downloaded to your computer.

8. Before running the installer You need to create a MySQL database for your Live Website.
Note: The whole process of creating a new MySQL database will be similar to what we have already mentioned above section.
9. Upload the downloaded package and installer files to the hosting account.
To do this,
- Start by connecting to your live site using an FTP client.
- Once connected, ensure that the root directory of your website is completely empty.
- The root directory is typically located in /home/public_html/ folder.
- If your WordPress hosting company automatically installed WordPress upon sign-up, you might find WordPress files in the root directory. In that case, you need to delete those files.
- Next, upload the archive.zip and installer.php files from Duplicator to the empty root directory.
- Access the installer script by visiting yourdomain.com/installer.php.
- Check if all indicators are green, then click Next to proceed.
- Install the database by providing the database details (host, database name, username, and password). You can find these details in the MySQL Database menu. Use “localhost” as the host. Test the database to ensure the credentials are correct, then click Next.
- Update your data by entering the domain name and WordPress installation folder path. If both are correct, click Next.
- Test your WordPress site and Click on Admin login to access your dashboard.
Final Checkouts
If you have started creating a new website from scratch directly on the live server, there are some final checkouts you need to look at before hitting the “Live” button.
1. Updating DNS Settings: Learn about DNS and its role in directing visitors to your website. Obtain DNS information from your hosting provider. Access domain registrar settings to update DNS records.
2. Pointing Your Domain to Your Hosting Server: Configure domain settings to link your domain with your hosting server. Update nameservers or add DNS records for proper domain resolution. Verify the domain propagation process and ensure website accessibility.
3. Final Website Checks: Conduct a final review of your website’s content, design, and functionality. Test website accessibility from different devices and browsers. Resolve any last-minute issues or errors before going live.
4. Announcing Your Website Launch: Craft an engaging announcement or blog post about your new website. Share the news on social media platforms and relevant online communities. Encourage visitors to explore and provide feedback on your live website.
Run a test on your live site for errors
Whatever method you choose to make the website live on WordPress, you must run a test to ensure that there are no errors present and that it runs smoothly without any hiccups.
Here, we have provided you with a checklist after you have moved your website from the local server to the live site.
Check WordPress Dashboard
- Check if all admin pages load without any issues.
- Test the ability to add, edit, and manage posts, pages, and any custom post types.
- Ensure that your website can be indexed by search engines by going to Settings → Reading and ensuring that ‘Discourage search engines from indexing this site’ is unchecked.
- Confirm that plugin and theme pages are accessible and functioning correctly.
- Verify if you can install new plugins without any complications.
Check the Front End of your Website
- Verify that the front end of your website appears as expected.
- Test all links to confirm they are functioning properly.
- Ensure that interactive elements such as sliders, accordions, and pop-ups are working smoothly.
- Submit forms and confirm that they are successfully received.
Establish Regular Backups
After your website is live, the most crucial thing you should never forget to do is to establish regular backups to protect your website from any potential problems that can occur due to hacker attacks, recent updates, or certain changes.
WPOven‘s managed WordPress hosting offers automatic backups based on Amazon S3, ensuring a complete peace of mind experience.
Check your website’s Speed
Since website speed is another ranking factor for search engines, you should never take it for granted. While you may not have integrated a CDN or caching on your local host, it is essential to consider their implementation once your site is live.
These tools can significantly enhance the loading speed of your website.
Conclusion
Now we have covered all scenarios on how to make a website live on WordPress. Whichever path you choose, remember to follow the steps systematically to avoid any mishaps or damage to your website.
By following the mentioned steps, your website should run smoothly. If you encounter errors, refer to our ultimate guide on “WordPress Common Errors” for assistance. Also, prioritize ongoing website maintenance, updates, and content optimization.
Celebrate the successful launch of your website and embrace the opportunities it brings. Remember, launching your website is just the beginning. Continuously monitor its performance, engage with your audience, and make regular updates to ensure online success.
If you have any queries or are still unsure about making your website live on WordPress, feel free to comment below.
Frequently Asked Questions
How do I know if my WordPress site is live?
To check if your WordPress site is live, simply visit the link “www.yourdomain.com/wp-admin“. If you see a page prompting you to enter your WordPress login credentials, it means your WordPress site is live.
How long does it take for the WordPress site to go live?
Once you successfully migrate your website from the local server to the live site, it will become live instantly. However, updating the nameservers can take up to 48 hrs.
Do WordPress sites expire?
WordPress sites do not have an expiration date by default. Once you have set up a WordPress site, it will remain active and accessible unless you choose to delete or deactivate it. However, it’s important to note that hosting providers may have their own policies regarding site retention, so it’s recommended to check with your hosting provider for any specific limitations or expiration policies they may have in place.

Rahul Kumar is a web enthusiast, and content strategist specializing in WordPress & web hosting. With years of experience and a commitment to staying up-to-date with industry trends, he creates effective online strategies that drive traffic, boosts engagement, and increase conversions. Rahul’s attention to detail and ability to craft compelling content makes him a valuable asset to any brand looking to improve its online presence.

